You’re overwhelmed by shaky mounts and confusing specs, but you’ve asked the perfect question. Aim for $250 to $400 to avoid frustration with cheap gear. A 6-inch Dobsonian offers huge views without complex alignment, while refractors shine on planets. Obviously, bigger apertures gather more light, yet portability matters for dark hikes. Skip kits with poor eyepieces; plan to upgrade those first. Keep exploring these choices to find your ideal match under the stars.
What Should You Spend on a Beginner Telescope?
How much should you actually spend on your first telescope? You’re probably staring at confusing numbers right now. Don’t worry, that’s exactly where most beginners get stuck.
Your budget considerations really drive this decision. A cheap $70 scope shows the Moon fine. However, shaky mounts often ruin your view quickly. You’ll likely want to aim higher.
The sweet spot price range sits between $250 and $400. Here, you get stable mounts and clear optics. This investment keeps your hobby alive longer. Spending under $100 often leads to frustration instead of wonder.
Obviously, bigger apertures cost more money. Yet, portability matters too if you hike to dark skies. Leave room in your budget for extra eyepieces. Investing in quality optics ensures that light transmission remains high even as you push your equipment to its limits.
Don’t buy the absolute cheapest option available. Save up for that mid-range model instead. Now, which design actually fits your specific viewing goals?
Comparing optics and performance side by side helps ensure your chosen telescope aligns with your specific stargazing needs. Understanding telescope aperture size is also crucial since it directly determines how much light the instrument can gather for clearer views.
Which Telescope Design Matches Your Viewing Goals?
You’ve sorted your budget, but staring at those three main designs probably feels overwhelming. Which one actually fits your night sky dreams? Let’s break it down simply.
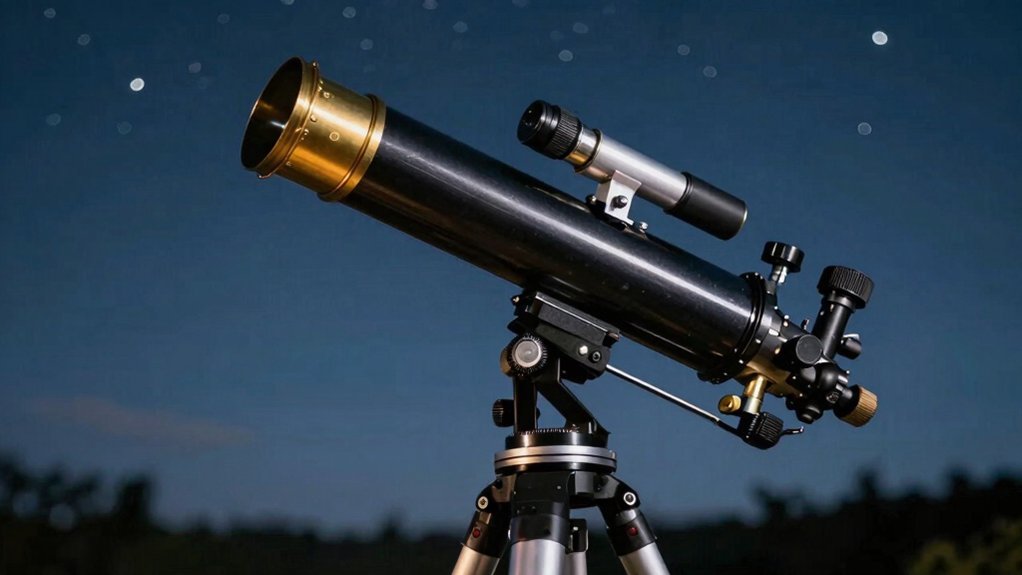
If you crave sharp views of the Moon or planets, refractor advantages shine brightly here. These scopes offer high contrast and need almost zero maintenance for quick setup. You’ll love grabbing a small 70mm model for instant stargazing sessions without hassle. Their sealed optical tubes also prevent dust accumulation, ensuring consistent image clarity over many years of use.
However, do faint galaxies and nebulae call your name? Then reflector benefits become your best friend immediately. You get huge apertures like 6 or 8 inches for the lowest possible cost. This extra light gathering power reveals deep-sky secrets that smaller lenses simply miss every time. Newtonian reflectors specifically utilize a parabolic primary mirror to focus light without the chromatic aberration found in some lens-based systems.
Hybrid models exist too, yet they often suit specific imaging needs rather than pure visual starting points. Choose the tool matching your primary target tonight. While reflectors excel at deep-sky viewing, their open tube design requires occasional collimation alignment to maintain optimal image quality. Ready to see how mounting affects everything next?
Why Are Dobsonian Mounts Best for Starters?
Something about those complex mounts probably feels intimidating right now. You don’t need polar alignment or confusing star routines here. Dobsonian advantages shine because you simply push the tube by hand. This beginner simplicity lets you focus on finding objects, not fighting hardware. Following a practical step-by-step walkthrough ensures you master basic setup procedures before your first night under the stars.
Now, consider your budget. These mounts cost far less than equatorial options. You get a massive 6-to-8-inch aperture for under $500 easily. That huge “light bucket” gathers way more light than cheap department store scopes. Obviously, bigger mirrors mean brighter views of galaxies and nebulae tonight. By prioritizing aperture over portability, beginners can access deep-sky objects that remain invisible in smaller, costlier telescopes.
Stability matters too. The sturdy base eliminates shaky vibrations that ruin small tripod views. You assemble it quickly and start observing almost immediately without frustration. While they aren’t for astrophotography, they rule for visual astronomy. The design relies on altitude-azimuth movement to track celestial objects smoothly across the sky without complex motorization. Your next step involves deciding exactly how much aperture you really need.
How Much Aperture Do You Really Need?
Since aperture dictates exactly how much light your scope gathers, it’s the single most critical number you’ll see. You’re wondering how big is big enough without getting overwhelmed by size. Understand the aperture importance immediately: bigger lenses reveal fainter stars and sharper details on planets. Most beginner recommendations suggest starting between 70 mm and 150 mm for ideal results. A 4-inch telescope offers a perfect balance of power and portability for your backyard. Anything smaller than 60 mm often disappoints, while huge scopes become cumbersome chores. You want a setup ready in ten minutes, not an hour of assembly. Larger apertures handle higher magnification better, letting you push views further on clear nights. Choose the biggest size you can comfortably carry and store inside your home. Don’t sacrifice usability for raw power if you won’t actually drag it outside. Find that sweet spot where excitement meets convenience for your specific situation. Remember that light gathering power increases exponentially with aperture diameter, allowing you to see deep-sky objects that smaller scopes simply cannot detect. Expert guides emphasize that optical quality is just as vital as size to ensure crisp, high-contrast images. Different telescope designs like reflectors often provide more aperture per dollar compared to refractors, making them a cost-effective choice for beginners seeking maximum light collection. Now, let’s look at what else comes included with these popular starter models.
What Essential Accessories Come in the Box?
Although the box looks full, you’re probably wondering if those included accessories actually work well. Most kits ship with just one cheap eyepiece, leaving you stuck with limited views. You really need different eyepiece types to see both wide star fields and detailed planets.
Here’s the thing: a single low-power lens won’t cut it for serious observing. Swap that bundled glass for a quality 10 mm or 25 mm Plössl immediately. This simple change drastically improves your image clarity and comfort during long nights.
Don’t forget the beginner Barlow lens often included in these sets. This tiny tube doubles your magnification instantly, effectively giving you more options without extra cost. It bridges the gap when your kit lacks variety. Expert observers recommend verifying the optical coating on any included Barlow lens to ensure it does not degrade image brightness.
Your real takeaway? Treat included gear as a starting point, not the final solution. Be sure to keep your new optics organized and protected using dedicated eyepiece cases. Understanding your current location is also vital for determining which celestial objects are visible tonight. Properly aligning your finder scope ensures you can quickly locate targets without frustration. Now, are you ready to pick your first target in the night sky?