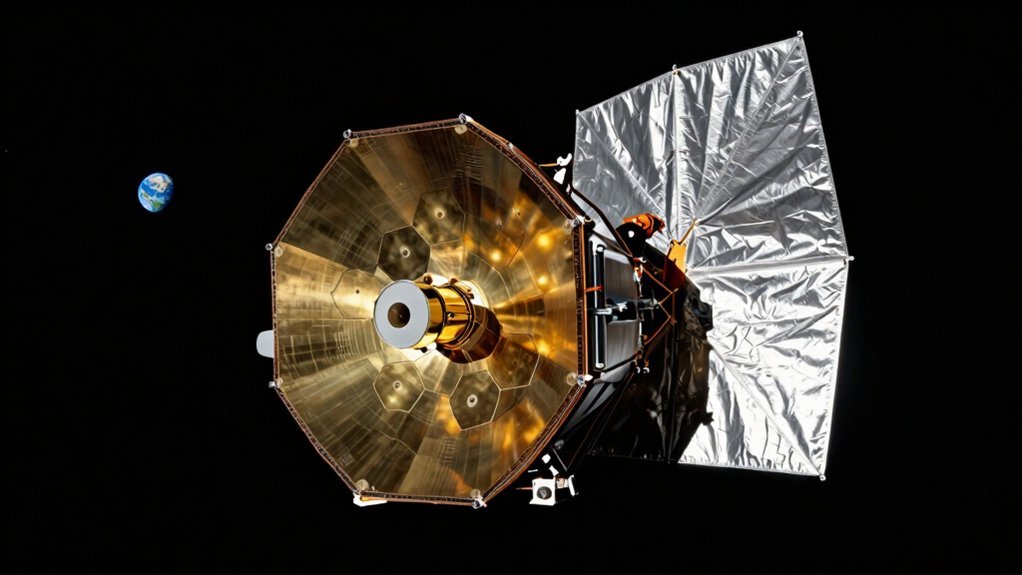
You’re wondering how Hubble turns faint starlight into those crystal-clear cosmic portraits, and it all starts with its 2.4-meter mirror catching photons above Earth’s blurry atmosphere. Now, this Ritchey-Chrétien system bounces light to a secondary mirror, focusing it through a hole for instruments to detect ultraviolet to infrared waves. Obviously, orbiting 340 miles up avoids atmospheric distortion, giving you sharp 0.05 arcsecond resolution. You’ll see exactly how raw data becomes vibrant color next.
How Hubble’s Mirrors Capture Distant Light
You’re probably wondering how a mirror floating in space actually catches light from billions of miles away. It starts with Hubble’s massive 2.4-meter primary mirror gathering photons across the electromagnetic spectrum. This huge surface area grabs faint signals that human eyes simply miss.
Now, advanced mirror technology makes this possible using ultra-low-expansion glass. Engineers coat it with aluminum just three-millionths of an inch thick. A tiny magnesium fluoride layer boosts ultraviolet reflectivity considerably. You get sharp images because the mirror stays stable at seventy degrees Fahrenheit. The precision of these optical coatings ensures that specific wavelengths are reflected efficiently rather than absorbed or scattered. Maintaining this thermal stability is vital because even minute fluctuations can cause the glass to expand or contract, ruining the focal length required for crisp imagery.
All right, think of it like a giant bucket catching raindrops in a storm. The bigger the bucket, the more water you collect quickly. Hubble’s mirror works similarly for distant starlight over long exposures.
You now understand how size and coatings capture ancient light. Next, you’ll want to see exactly where that light travels inside the tube.
Crucially, this design utilizes a Ritchey-Chrétien optical system to eliminate coma and provide a wide field of view free from spherical aberration.
Tracing the Optical Path Through the Telescope
Two mirrors guide every photon through Hubble’s 2.4-meter Optical Telescope Assembly. You might wonder how such a long path fits inside. The Ritchey-Chrétien optical design folds the journey efficiently. Light hits the huge primary mirror first, bouncing forward.
Now, the smaller secondary mirror catches that beam. This step achieves critical light concentration, shrinking the image to dinner-plate size. Obviously, you need that focused energy for clear data. The beam then travels back through a hole in the primary mirror.
Finally, instruments analyze ultraviolet, visible, and infrared wavelengths behind the main mirror. This precise routing guarantees every photon reaches its destination accurately. You now see exactly how the path unfolds internally. Next, consider why being above Earth matters so much for clarity. Navigating current locations with ease allows the system to maintain precise alignment while tracing these optical paths. Understanding the focal ratio is essential because it determines the brightness and field of view available to the scientific instruments. Just as amateur astronomers must weigh optics and performance when selecting their own gear, Hubble’s specific configuration ensures maximum data quality for deep space observation.
Why Orbiting Above Earth Creates Sharp Images
Since you’re wondering why space matters, here’s the thing: Earth’s atmosphere blurs light like looking through rippling water. You see, turbulent air masses bend incoming starlight unevenly, causing significant atmospheric distortion that smears fine details. Ground telescopes fight this constant battle, but Hubble orbits 300 miles up, completely escaping that messy, churning air. Now, this stable position lets the telescope capture steady, unwavering light for incredible sharpness. You get an image resolution of 0.05 arcseconds, separating objects that look blended from the ground. Obviously, avoiding clouds and light pollution helps faint galaxies stand out against a truly black background. Hubble doesn’t see better because it’s closer to stars; it wins by dodging our atmosphere entirely. Additionally, circling at roughly 540 km altitude every 90 minutes ensures the instrument remains above the densest atmospheric layers that would otherwise degrade its view. This unique vantage point allows astronomers to utilize ultraviolet observations that are otherwise blocked before reaching the ground. Achieving such clarity requires a step-by-step build of precise optical components to maintain focus without atmospheric interference. Beginners should follow a practical walkthrough to understand how each component contributes to the final image quality.
Detecting Ultraviolet, Visible, and Infrared Waves
Now that you’ve grasped why space matters, you’re probably wondering how Hubble actually sees different kinds of light. You rely on instruments like COS to capture ultraviolet astronomy data, revealing hot, energetic phenomena Earth’s atmosphere usually blocks. The WFC3 UVIS channel seamlessly links these ultraviolet views with visible light, showing you true cosmic structures and colors.
Here’s the thing: dust often hides distant objects from visible sensors, so you need infrared imaging to pierce through that haze. The WFC3 IR channel surveys these hidden regions ten times faster than older NICMOS systems ever could. You get a complete picture by combining all three wavebands, from 1,200 Angstroms up to 2.4 microns. Selecting the right aperture size determines how much light a telescope can gather, which is fundamental for resolving faint details across these varied wavelengths.
Obviously, each instrument plays a specific role in building this broad spectrum view for your analysis. You now understand how Hubble captures light across the electromagnetic spectrum. While Hubble excels at deep-space observation, comparing telescope options helps stargazers determine which optics and performance levels best suit their own viewing needs and budget. Selecting the right telescope aperture is equally critical for amateur astronomers seeking to maximize light gathering power within their specific budget. But how does raw data become those colorful pictures you love?
From Raw Data to Colorful Discoveries
Three key steps turn Hubble’s black-and-white detector data into the vibrant cosmic portraits you see online. You might wonder how grayscale files become those stunning, colorful nebulae. It starts with rigorous data processing that converts raw signals into readable pixel values.
Next, image calibration cleans up noise and fixes sensor quirks so you see real stars. Scientists subtract background static and correct uneven sensitivity to reveal the true cosmic scene. This step guarantees every detail reflects actual light, not technical glitches. Cosmic ray strikes create white dots in images that must be removed during this cleaning process. Just as amateur astronomers must choose the right telescope types for their specific viewing goals, professionals select specialized instruments to capture distinct wavelengths of light. Selecting the proper optical design ensures the instrument delivers the sharpness and light-gathering power required for such precise scientific measurements. Enthusiasts should also consider their local light pollution levels when planning observation sessions to maximize contrast and detail visibility.
Finally, color composition assigns specific filters to red, green, and blue channels for your eyes. You get a full-spectrum view even from invisible wavelengths through careful scientific analysis. The result is a clear, breathtaking image ready for your exploration. Now you know exactly how those digital files transform into art. What specific galaxy do you want to explore next?