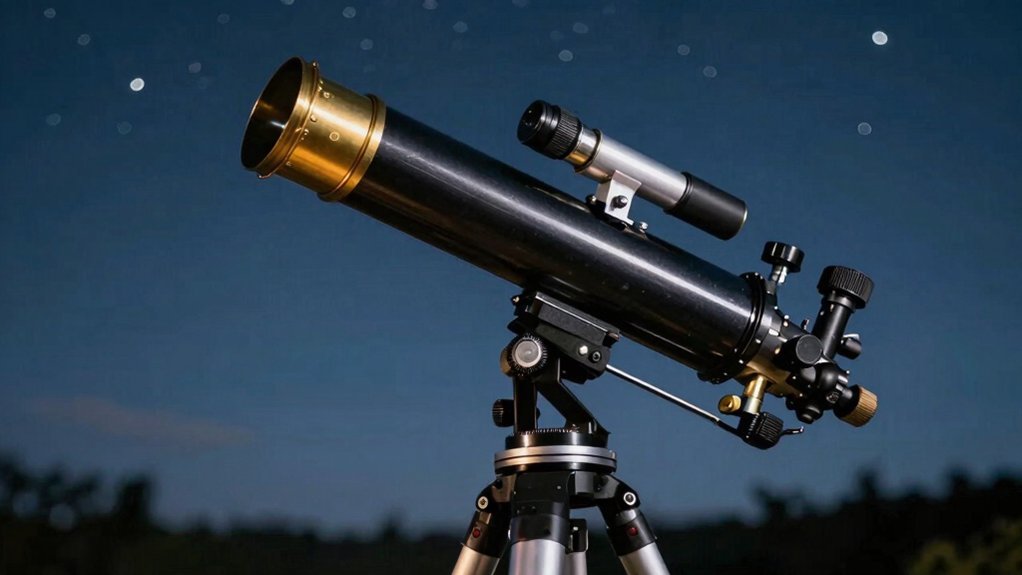
Staring at those knobs feels overwhelming, doesn’t it? You’re asking the right question. Start by setting up on firm ground and locking those tripod legs tight. Now, align your finder scope on a distant daytime object before nightfall. Here’s the thing: always center targets in the finder first, then swap to a 25mm eyepiece for focusing. Run SkyAlign using three bright stars to access your GoTo database. Keep going to master tracking faint deep-sky objects effortlessly.
Assemble Your Celestron Telescope on Stable Ground
You’re probably wondering why your view shakes even before you’ve looked through the eyepiece. It’s usually bad ground selection or a rushed tripod setup causing all that annoying wobble right now.
Pick firm, flat earth instead of soft grass or sloped driveways that shift under heavy weight. Spread your legs fully outward and lock them tight so your base stays wide and steady.
Now, level the head before mounting anything else to keep your whole system perfectly balanced from the start. Obviously, loose clamps ruin stability, so check every screw and knob for firm engagement immediately.
Your accessory tray acts as a essential brace, so install it to stop legs from drifting inward unexpectedly. Recheck everything after positioning because settling happens often on loose terrain beneath your feet.
Stable ground means clearer views, so don’t skip these critical steps before adding your optical tube assembly. Ready to attach the mount securely? Different telescope designs vary in their sensitivity to vibration, so understanding your specific optical performance needs can help determine just how critical this stability is for your viewing experience. While reflectors and refractors differ in construction, choosing the right telescope type for your environment can further minimize vibration issues before you begin observing. Properly managing thermal equilibrium by allowing your instrument to acclimate to outdoor temperatures will also reduce air currents inside the tube that degrade image sharpness.
Align the Finder Scope for Precise Targeting
Now that your tripod stands firm, you’re probably wondering why that tiny scope on top matters so much. It acts like a rifle sight, guiding your main telescope to distant targets quickly. Without it, finding specific stars feels like searching for a needle in a haystack.
Pick a fixed object at least 100 yards away during daylight hours. Center this target in your main eyepiece using the lowest power lens first. Keep the telescope steady while you work on the smaller scope above.
Apply proper finder adjustment techniques by turning the thumbscrews until crosshairs match your target. Use small increments to avoid overshooting the mark completely. Red dot finders need similar altitude and azimuth tweaks for precision. There are two main types of finder scopes, optical and red dot, each requiring specific alignment methods for best results. Understanding the differences in optical performance between these options helps stargazers choose the right tool for their viewing habits and budget constraints.
Employ alignment verification methods by checking both views repeatedly for perfect synchronization. Make certain the target stays centered in both scopes before finishing up. This step guarantees accurate pointing when you eventually look at night skies. Properly aligning the finder ensures you can locate faint deep-sky objects that would otherwise remain invisible in the main telescope’s narrow field of view. A well-aligned finder significantly reduces the time spent scanning the sky by narrowing down the search area effectively before switching to higher magnification.
Center Bright Objects Before Looking Through Eyepiece
Two quick steps save you from hunting blindly in the dark. You probably wonder why your target vanishes when you look through the eyepiece. Start by using your hand control to slew toward a bright star or the Moon.
Now, center that object in your finderscope first before checking the main view. This wide-field approach helps you choose alignment objects that are easy to spot. Obviously, missing this step makes precise aiming nearly impossible later on. The red dot finder alignment is best performed during the day for accuracy.
Switch to a low-power eyepiece for ideal centering of your selected target. Slowly tap the arrow keys until the object sits perfectly in the middle. Don’t rush these small adjustments, or you will overshoot your mark completely.
Verify the object is truly centered before pressing Enter on your hand control. Accurate placement now guarantees your telescope points correctly everywhere else tonight. Ready to sharpen that blurry image into crisp detail? Understanding the optical path ensures light travels correctly from the objective to your eye for the best possible view. Establishing a stable thermal equilibrium prevents air currents inside the tube from distorting your view before you begin observing. Always ensure your mount stability is secure on a solid surface to prevent vibrations that can ruin high-magnification views.
Focus Telescope Image and Calculate Magnification
Although that blurry mess looks discouraging, you’ve actually just found the perfect starting point for focusing. Grab your highest-number eyepiece, like a 25mm, and peek from just behind it. Turn the knob gently until that streetlight snaps into sharp clarity.
Now, let’s tackle magnification calculations. Simply divide your telescope’s focal length by the eyepiece number. A 1000mm scope with a 25mm eyepiece gives you 40x power. Swap to a 10mm eyepiece, and you instantly jump to 100x. When selecting equipment, remember that optical design significantly impacts image brightness and contrast alongside your magnification choices.
Remember, higher numbers aren’t always better since they dim the view. Mastering these telescope focusing techniques guarantees you never miss a detail. Always re-check focus whenever you change eyepieces or add accessories. Just as historical milestones relied on revolutionary telescope designs to unveil the cosmos, your ability to calculate power unlocks the full potential of your instrument. Understanding the differences between telescope types ensures you apply these calculations effectively for your specific instrument.
You now hold the math to control exactly how big objects appear. Ready to see how much detail you can pull from the night sky?
Run SkyAlign Procedure on NexStar Computerized Mounts
Three bright stars are all you need to teach your NexStar mount where it’s pointing. You’re probably wondering how the scope actually knows the sky. It starts with a solid SkyAlign setup. Level your tripod first, then power on the base. Enter your exact date, time, and location manually or via GPS. Obviously, accurate data means better pointing later. Now comes the fun part: Bright object selection. Pick three widely separated lights like planets or the Moon. Slew to the first one using your arrow keys. Center it in the finderscope, then the eyepiece, and press Align. Repeat this dance for the other two targets. Watch for “Match Confirmed” on your screen. If you miss, check your spacing or centering again. A successful alignment opens up your entire database for precise GoTo slews. Ready to swap eyepieces for sharper views? This process is designed so that no prior knowledge of the night sky is required for setup. Understanding how optical performance varies across different telescope designs can help you maximize the clarity of these aligned views. Selecting the right telescope optics ensures your instrument gathers enough light to make those initial alignment stars clearly visible against the night sky. Properly managing light gathering capability is essential during this phase, as telescopes with larger apertures will reveal fainter alignment stars that smaller models might miss.
Swap Eyepieces and Refocus for Planetary Detail
Grab that low-power eyepiece first to lock onto your target easily. You’ll center the planet quickly with its wide field of view. Obviously, finding objects is much harder when you start with high magnification.
Now, loosen the screw and swap in a higher-power option carefully. Different eyepiece types reveal varying levels of surface detail on bright worlds. Keep the telescope steady so your target doesn’t drift away completely.
You must master specific refocus techniques after every single change you make. Turn the knob slowly until the image snaps into crisp clarity. Atmospheric conditions often limit how much power you can actually use tonight. Remember that maximum useful magnification is roughly twice the telescope’s aperture in millimeters, so exceeding this limit will only degrade the image quality. Understanding optical resolution limits helps explain why pushing beyond this point yields no additional detail regardless of magnification. Selecting the right telescope aperture is crucial because it determines the light-gathering power and theoretical resolution available for your observations.
Recenter your target since higher magnification shrinks what you see instantly. Don’t push magnification too far if the air looks shaky or blurry. Try stepping up gradually rather than jumping straight to maximum power immediately.
Ready to keep that planet centered automatically without constant manual adjustments?
Track Targets via StarSense App or Hand Controller
You’re wondering how to keep that planet centered without constantly nudging the tube manually. The StarSense app handles this effortlessly through smart app navigation and precise target selection. You’ll love the intuitive user interface guiding your telescope movement with simple on-screen arrows.
Master alignment techniques by centering a distant object like a streetlight during daytime calibration. Perform careful position adjustment until the green bullseye confirms you are ready to observe. Effective battery management guarantees your phone lasts all night, so bring a spare power bank. It is important to note that the system lacks automatic tracking, requiring you to make manual adjustments while observing to keep targets in view. Utilizing altitude-azimuth mounts correctly ensures smoother movement when manually following celestial objects across the sky. Beginners should verify their optical alignment regularly to maintain accuracy throughout the viewing session. For optimal results under dark skies, ensure your eyes have fully undergone dark adaptation before attempting to spot faint galaxies or nebulae.
These observation tips transform complex tracking into a seamless, enjoyable experience for every stargazer. Now you can focus entirely on the cosmos instead of fighting your equipment. Ready to locate your first deep-sky object with total confidence?