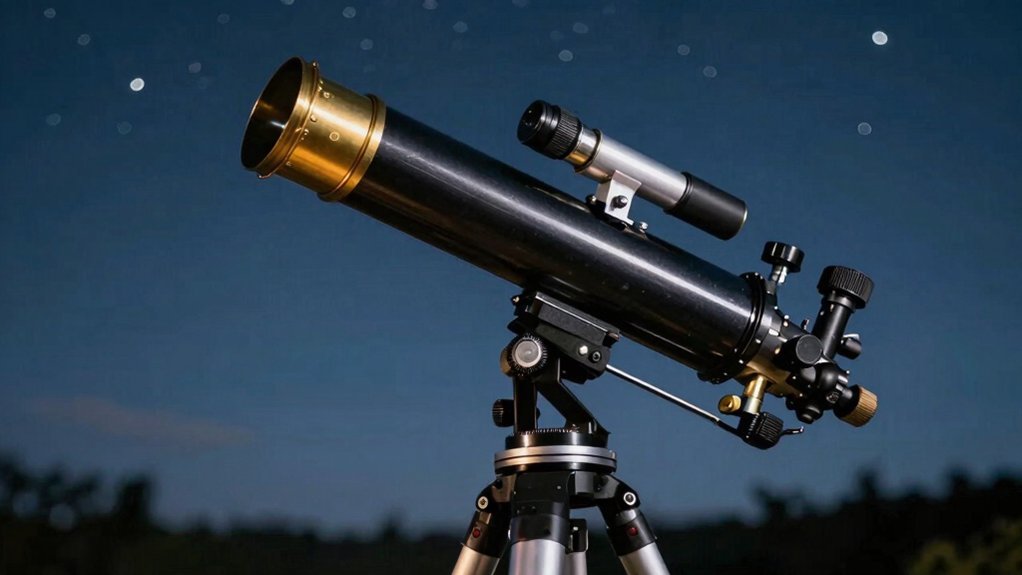
You’re staring at parts, wondering how to get clear moon views instead of blurry blobs. Start by leveling your tripod on solid ground and removing those plastic dust caps. Align your finder scope on a distant daylight target before swapping in your lowest-power eyepiece. Turn the focus knob slowly until stars look like tight points, not fuzzy clouds. Once stable, you can gradually increase magnification or add a Barlow lens for closer looks. Stick with these steps, and you’ll quickly master the setup for crisp, stunning nights.
Assemble and Level Your Gskyer Telescope Tripod
Since you’re wondering where to start, let’s tackle the tripod first because it’s your foundation. Extend those legs fully before mounting anything else. You need a flat surface to guarantee real tripod stability during your stargazing sessions. Lock each clasp snugly; overtightening actually harms the hardware over time.
Now, level the base before adding heavy gear. Adjust the feet until the bubble sits perfectly center. Obviously, a tilted stand causes image drift later, so don’t skip this step. Check that all three legs touch the ground firmly without rocking. The lightweight aluminum construction ensures the folding tripod remains easy to transport while maintaining a sturdy design for stability. While Gskyer models are popular entry-level options, selecting the right telescope often depends on balancing optical performance against your specific budget and viewing goals. Properly managing the center of gravity prevents tipping when pointing the scope toward zenith, ensuring a safer observing experience. Expert astronomers recommend verifying the tripod stability by gently nudging the setup to confirm no wobble exists before attaching the optical tube.
Here’s the thing: the accessory tray isn’t just for holding eyepieces. It locks the legs together, adding essential rigidity to the whole structure. Align it with the center pin and tighten until secure. Verify everything feels solid before moving forward. Your next step involves preparing the optical tube itself.
Remove Dust Caps and Secure the Optical Tube
Peel off both plastic dust caps right now to let the light in. You might wonder why your view stays pitch black; obviously, a closed cap blocks everything. Proper dust cap removal guarantees no hidden packing material obstructs your optical path before you start observing. Expert observers recommend allowing the optics to reach thermal equilibrium with the night air to minimize internal air currents that can distort your view. Maintaining a clean optical surface is equally vital for preventing scattered light from degrading contrast during observation.
Now, slide the tube onto the mount and tighten those screws until it feels solid. Optical tube security prevents annoying slipping while you aim at distant stars later tonight. Don’t over-tighten the fasteners, though, since you could damage the hardware or crack the thin metal. The main telescope tube features a beautiful finish that deserves careful handling during this mounting process. Ensuring the optical alignment remains undisturbed during assembly is critical for maintaining image clarity.
Keep the covers on whenever you aren’t looking through the lens to stop dust buildup. If moisture appears, let the optics dry completely before replacing any protective caps for storage. Your telescope needs stable mounting and clear glass to deliver those crisp, bright images you expect.
Ready to point your scope at something specific? Next, you’ll need to align that finder scope on daylight targets.
Align the Finder Scope on Distant Daylight Targets
Although you might wonder why we aren’t waiting for nightfall, daylight actually makes aligning your finder scope much easier. You need a distant target like a chimney or water tower at least 100 yards away. Avoid the Sun entirely while picking your spot.
Now, center that object in your main telescope using the lowest-power eyepiece first. Lock the tube tight so nothing shifts during this critical process. Obviously, a steady base makes these alignment techniques work perfectly every single time. Use the largest eyepiece to ensure the finder scope is centered on the same object being viewed through the telescope for accurate alignment.
Look through the finder scope next and tweak the adjustment screws slowly. Move the crosshairs or red dot until they sit right on your target. These daytime tips guarantee you won’t hunt blindly when darkness finally falls. Expert guidance suggests maintaining optical stability by ensuring all locks are secure before making fine adjustments to prevent image drift. Understanding light gathering helps explain why precise alignment is crucial for maximizing the telescope’s ability to collect faint light from distant stars. Different telescope designs offer varying aperture sizes which directly influence how much light enters the instrument and affects the brightness of your final view.
Check the main eyepiece again to confirm everything still matches up perfectly. If the target drifted, just repeat the screw adjustments until both views agree. Your telescope is now ready for serious stargazing adventures tonight.
Insert the Lowest Power Eyepiece for Easy Viewing
Now that you’ve aligned your finder, you’re probably wondering which eyepiece to grab first. Grab the lowest-power one immediately. This choice gives you the widest field of view, making it easiest to locate star clusters or nebulae. You want that bright, manageable image before chasing tiny details.
Your eyepiece selection depends on your telescope’s barrel size. If you have a 1.25-inch model, slide in a 32 mm piece. For 2-inch barrels, try something between 35 mm and 40 mm. Understanding magnification basics helps here: divide your scope’s focal length by the eyepiece number. A longer number means lower power. Obviously, starting low keeps things simple. Lower magnification provides brighter and sharper images that significantly improve the visibility of faint objects. Realistic viewing also requires allowing your eyes to adjust to the dark adaptation process for about 20 minutes to see these dimmer celestial features clearly. Different optical designs like refractor telescopes offer distinct advantages in contrast and maintenance that complement your eyepiece choices. Properly securing these components ensures stable optical alignment during your observation session.
Begin with roughly 30x to 50x magnification for your first look. This approach frames multiple objects comfortably without demanding perfect focus. Once you center your target easily, you can swap to higher powers later. Always start low to find your way around the sky efficiently.
Focus the Image by Turning the Knob Slowly
Turn that coarse focus knob with a gentle touch to stop the stars from dancing. You’ve probably wondered why your view stays blurry even after finding your target. Obviously, shaky legs ruin everything, so make sure your tripod stands firm on level ground first.
Now, begin coarse focusing by making slow, gradual turns while watching the image sharpen. If things get worse, just reverse direction immediately until clarity returns. Don’t rush this step, or you’ll overshoot the sweet spot entirely.
Here’s the thing: near best focus, you need tiny increments to find true sharpness. Pause between tweaks so the image settles before you judge those crisp edges. Stars should look like tight points, not bloated fuzzy balls. Adjusting the focal length correctly ensures that light converges precisely at the eyepiece for maximum detail.
Remember that temperature shifts or new eyepieces often demand slight refocusing later. Keep your hand steady and patient for the clearest possible views tonight. Ready to zoom in closer on that sharp image? Achieving optimal results also requires understanding how atmospheric conditions impact the stability of your view. Additionally, ensuring your optical alignment is correct before observing can prevent persistent blurriness that focusing alone cannot fix.
Swap to Higher Magnification After Centering Targets
That sharp image you just found probably looks a bit small in your current view. You need a proper magnification technique to see details clearly without losing your target entirely. Start by locking your mount tight before beginning your eyepiece shift to higher power.
Obviously, precise centering methods matter most right now because the view narrows considerably with smaller eyepieces. Place your object dead center in the wide field before swapping out that low-power lens. If you rush this step, you will likely lose the object completely during the change.
Expect the image to blur immediately after you insert the new eyepiece into the focuser. You must make fresh focusing adjustments since every lens change shifts the optical plane slightly. Gently nudge the mount if the target drifts off-center due to inevitable handling bumps.
Always swap lenses one step at a time rather than jumping straight to maximum zoom. Be aware that misaligned objects are common when switching to higher power, so be prepared to shift and refocus. Understanding exit pupil diameter helps ensure the image remains bright enough for your eye to perceive fine details at these increased powers. Ready to enlarge that view even more with extra glass?
Add a Barlow Lens Once Basic Focus Is Clear
Since you’ve got a sharp image, you’re probably wondering how to zoom in further without losing your target. That’s exactly where the Barlow lens shines. You’ll uncover real Barlow lens advantages by doubling or tripling your magnification instantly without buying new eyepieces.
Now, let’s talk about correct Barlow lens placement. Slide the Barlow into your focuser first, then push your eyepiece firmly into the Barlow itself. Tighten those thumbscrews well so nothing slips during viewing. Obviously, loose parts ruin your careful alignment quickly. Increasing the space between the Barlow and eyepiece increases the magnification. When selecting optical accessories, remember that optical quality directly impacts the clarity of the final image regardless of the magnification power used. Understanding the focal length of your telescope is essential because it determines the base magnification before any additional lenses are applied.
Next come your necessary Barlow lens adjustments. Turn the focus knob slowly because higher power makes focusing much more sensitive than before. Don’t believe common Barlow lens misconceptions that claim it magically improves image quality regardless of conditions. It only magnifies what you already see clearly. Remember that atmospheric turbulence often limits useful magnification more than your equipment does, so observe when the air is steady.
Keep your target perfectly centered before switching to this higher power setup. Ready to tackle shaky views next?
Fix Blurry Views and Telescope Stability Issues
You just boosted your magnification, so shaky or fuzzy views probably have you wondering what went wrong. Start focusing with your largest eyepiece, like a 20mm one, before switching to higher power. Remove any Barlow lenses immediately if you see blurry images clouding your view of the Moon.
Now, check your focuser travel and verify the eyepiece sits tightly within the tube. Loose tensioning screws often cause wobbly views that ruin your entire observing session. Regular telescope maintenance includes cleaning smudged lenses with a soft, lint-free cloth gently.
Set up your scope thirty minutes early so optics adjust to the cold night air. Avoid concrete surfaces that create heat waves and distort your steady view of stars. Stable ground and cool lenses fix most stability issues beginners face tonight. Ensuring proper thermal equilibrium prevents air currents inside the tube from degrading image quality further.
Your next step involves checking mirror alignment if blur persists despite these solid adjustments. If the image remains unclear, you may need to adjust the distance between lenses by turning the threaded barrel of the front lens inward or outward.