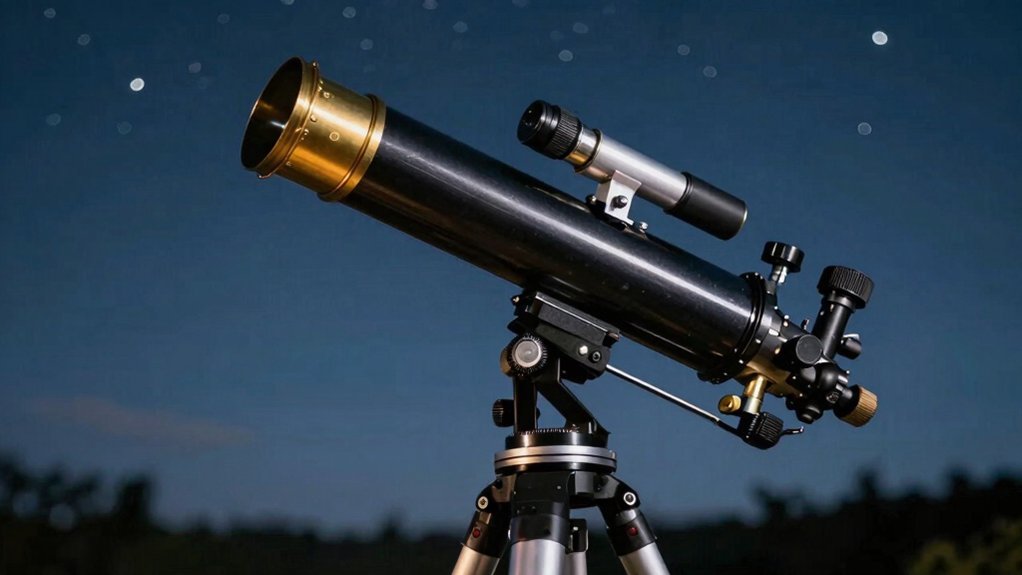
You’re staring at blurry blobs because focusing takes more than just twisting a knob. Start by aiming at a distant tree over 200 meters away during daylight. Insert your lowest power eyepiece first, then turn the coarse focus knob slowly until edges sharpen. Now, align your finderscope on that same target before nightfall. Obviously, steady mounts matter just as much as glass quality. You’ll master pinpoint stars once you grasp these specific daytime calibration steps.
Choose a Distant Daylight Target for Focus
Since stars look like tiny, frustrating dots, you’ll want to pick a distant daylight target first. You need something at least 200 meters away, like a street sign or treetop. This distance mimics infinity, making your later night viewing much smoother.
Now, consider your target selection carefully. Choose stationary objects with sharp edges, avoiding anything moving or too close. Obviously, nearby items fall inside your telescope’s minimum focus range, ruining the test. Different telescope designs have varying minimum focus distances, so consult your optical specifications to ensure your chosen target is far enough away for your specific instrument.
Here’s the thing about daylight advantages: bright sun reveals details instantly. You see focus changes clearly on a building edge, unlike faint starlight. This practice lets you adjust everything before darkness falls, saving huge headaches later. Properly aligning your finder scope during the day ensures you can actually locate these distant targets before attempting to focus.
Aim for the farthest visible object in your line of sight today. High-contrast shapes help you judge exact sharpness without guessing in the dark.
Master this step now, and you’ll nail perfect focus when real observing starts tonight. Understanding optical infinity ensures your instrument is calibrated correctly for celestial bodies that are effectively infinitely far away.
Align the Finderscope Before Nightfall
Although you’ve focused the main scope, you’re probably wondering why that tiny finderscope still looks so off. You need solid finder mounting before anything else, so tighten those bracket screws firmly now. Loose hardware ruins everything later, and you definitely don’t want your gear shifting in the dark. Different telescope designs require specific optical systems to function correctly, so understanding your equipment’s unique mechanics helps prevent alignment errors. Selecting a telescope with the right aperture size ensures sufficient light gathering power, which makes identifying distant daylight targets easier during this initial setup phase. Since reflectors and refractors handle light differently, knowing your telescope type is essential for anticipating how the image will appear during alignment.
Now, let’s talk target selection. Pick a distant object while daylight visibility remains high, since stars are too hard to track right now. Center that object in your main eyepiece first, then use specific adjustment techniques to match the finder. Turn those small screws gradually until the crosshairs or red dot sit exactly on your chosen spot.
Here are some quick alignment tips: always recheck the main view after every tiny tweak you make. Test a second object to confirm consistency before the sun sets completely. You’ve got a solid baseline now, so are you ready to swap in that low-power eyepiece? Ensure all tools point to the same area by verifying that the finderscope alignment matches the centered view in your eyepiece.
Insert the Lowest Power Eyepiece First
Now that your finder is locked in, you’re probably staring at that eyepiece drawer wondering which one to grab first. You need the lowest-power option immediately. This specific piece offers the widest field of view, making your target much easier to locate and focus initially.
Different eyepiece types exist, but you must choose the one with the highest focal length number, like 25 mm or 40 mm. Higher numbers mean lower magnification and a brighter, more forgiving image for your first look. Avoid starting with short focal lengths because they narrow your view too drastically right now. While refractors use lenses and reflectors use mirrors, both designs rely on light gathering capabilities that are best utilized at lower powers before increasing magnification.
Seat this eyepiece firmly into the focuser and tighten the thumbscrew securely before touching any knobs. You cannot achieve a sharp image if the glass wobbles inside the tube during adjustment. Always begin your observing session with this wide-angle setup to guarantee success. Starting with lower magnification provides brighter and sharper images that significantly improve the visibility of faint objects. Utilizing optical alignment techniques ensures your optics perform at their peak before you attempt higher powers. The simplified mechanics of light gathering rely on aperture size to determine how much illumination reaches your eye through that wide lens.
Ready to tighten that screw and start looking?
Center the Object in the Main View
Precision starts with a fixed, distant target like a telephone pole or chimney several hundred feet away. You need this stability because moving objects ruin your optical alignment efforts immediately. Obviously, daylight makes spotting these distant markers much easier for you. Ensure your target is at least half a mile away to guarantee effective alignment accuracy. Understanding how light gathering works helps explain why distant, stationary targets provide the consistent illumination needed for precise calibration. Properly managing optical aberrations during this initial setup prevents distorted edges from misleading your centering adjustments. Selecting the correct aperture size ensures sufficient brightness and resolution to clearly distinguish your distant calibration target against the sky background.
Now, point your tube until that target sits dead center in your main eyepiece view. This step is the heart of successful telescope calibration, so don’t rush it. If the image drifts, just recenter it before touching any finder scope screws.
Use small, controlled corrections to keep everything locked in place without overshooting. Your main view acts as the final truth for where your telescope actually points. Once you verify the target is perfectly centered, you’re ready to refine your focus.
Turn the Coarse Focus Knob Slowly
Grab that large coarse focus knob and give it a slow, deliberate turn. You’re staring at a blur, right? That’s totally normal. Slow turning reveals if image clarity is improving without overshooting the mark.
Here’s the thing: rapid spins skip past the sharpest point instantly. Pause between turns to judge changes better. If the view worsens, just reverse direction immediately.
Coarse adjustments handle big moves only, not final precision. Think of it like finding a radio station; you scan broadly first. Once nearly sharp, stop using this knob.
Obviously, pushing further makes finding best focus harder. You’ve now reached the limit of what these large steps can do. The image is close, but not quite perfect yet.
Ready to lock in that crisp detail? You need finer control now to sharpen the view completely. Remember to loosen the focus lock knob before making these adjustments to ensure smooth operation and prevent damage to the mechanism. Properly managing thermal equilibrium ensures your optics stabilize for the sharpest possible view during this process. Starting with the lowest power eyepiece provides a wider field of view that makes initial focusing significantly easier. Understanding optical aberrations helps you distinguish between true focus issues and inherent lens limitations while making these initial broad adjustments.
Sharpen the Image With Fine Adjustments
That blurry mess you’re seeing? You can fix it instantly with precise, tiny turns on your fine focus wheel. Don’t rush; pause between adjustments to let the image settle before chasing that perfect sharp point.
Now, try using specific focus aids like a Bahtinov mask to nail exact alignment on bright stars. These tools create diffraction spikes that intersect perfectly when you hit the sweet spot, removing all guesswork.
Here’s the thing: mastering fine focus techniques means checking symmetry in defocused rings rather than just guessing at pinpoint stars. If the pattern looks uneven, your collimation might need work before you tweak the focuser again.
Always verify sharpness across the whole field, not just the center, to avoid soft corners ruining your view. Stabilize your mount and let the scope cool down so vibrations don’t mask your hard work. Be aware that recent abundant rainfall in the Savannah area has increased atmospheric moisture, which can distort star views and make achieving a stable focus feel like looking through a lake of water. Different optical designs react uniquely to these atmospheric conditions, requiring varied approaches to maintain clarity. Understanding how thermal equilibrium affects your optics ensures the tube reaches ambient temperature for the crispest possible images. Selecting the right eyepiece focal length is also critical, as it determines the magnification power and exit pupil size for optimal viewing comfort.
You’ve got the focus dialed in, so are you ready to crank up the magnification for serious detail?
Switch to High Power for Detailed Views
Two quick steps keep your target from vanishing when you crank up the magnification. First, master target acquisition at low power to center your object perfectly. Obviously, high power narrows your view, so precise eyepiece selection matters now.
Next, swap eyepieces only after locking that central position tight. You must re-apply focusing techniques because image clarity shifts with every change. Remember, optimum magnification depends on viewing conditions and atmospheric effects, not just your gear.
Pushing beyond 50x per inch of aperture often ruins detail resolution. Smart observing tips suggest stopping where the image stays sharp, not blurry. Your goal is revealing fine features, not maximizing numbers blindly.
Stabilize your mount since vibration grows annoying at these levels. Now you see why patience beats rushing straight to high magnification. Ready to test your focus on a bright star? To ensure the best results, always verify your setup against atmospheric stability before attempting high-power observations. Checking the current status of local seeing conditions can prevent frustration when switching to higher magnifications.
Focus on Bright Stars as Pinpoints
Target a bright star to nail your focus because it acts as the perfect reference point. You need a moderately bright star, ideally magnitude 3 or 4, for the best results. Obviously, extreme brightness can overwhelm your view, so pick carefully based on star brightness levels.
Center that star right in your eyepiece before you start tweaking anything. Now, turn your focuser knobs slowly until the bloated disk shrinks into a tiny dot. These focusing techniques rely on making the image as small as physically possible.
Watch the star transform from a gray circle into a sharp pinpoint of light. If you use a Bahtinov mask, align the central spike perfectly between the others. Remove the mask afterward to confirm you still see that crisp, tiny point.
Your goal is always a distinct point without any fuzzy halos surrounding it. Once you achieve this sharpness, you are ready to tackle any blurry images next. Since atmospheric seeing conditions can cause shimmering that complicates clarity, it is often helpful to start with lower magnifications to establish initial focus before increasing power.
Fix Blurry Images and Shake Issues
You’ve nailed the pinpoint star, yet your views of planets or the moon still look like a fuzzy mess. Don’t panic; you likely just need to check assembly and guarantee every lens sits tight. A loose eyepiece or forgotten dust cap creates instant blur, so verify your whole optical path first.
Now, let’s tackle that wobbly image. You must optimize cooling by letting your scope sit outside for thirty minutes before viewing. Hot mirrors distort light like heat waves off pavement, ruining your sharp focus instantly.
Also, reduce magnification immediately if things look soft. High power amplifies shake and bad air, so start with a low-power eyepiece instead. Tighten those focuser screws and avoid touching the tripod while observing.
Your takeaway? Stable gear and cool optics equal crisp views. Ready to lock that focus down permanently for cameras?
Lock Focus for Astrophotography Cameras
Since autofocus hunts wildly in the dark, you’ll need to switch your lens to manual focus mode immediately. Obviously, you want sharp stars, not blurry blobs. Now, enable Live View and zoom in 10x on a bright star like Sirius.
Rotate the focus ring slowly until that star shrinks to its tiniest possible point. Here’s the thing: edge aberrations lie, so keep your target dead center. Once perfect, you must secure that position with a solid focus lock.
Use gaffer tape to physically stop the ring from slipping during long exposures. Even a tiny bump ruins hours of work, so treat your gear gently. Take a test shot and check stars at 100% magnification before committing.
If they look bloated, make tiny adjustments and retest until crisp. Finally, leave the lens untouched unless temperature shifts force a recheck. Your sharp images depend entirely on maintaining this precise setting all night.