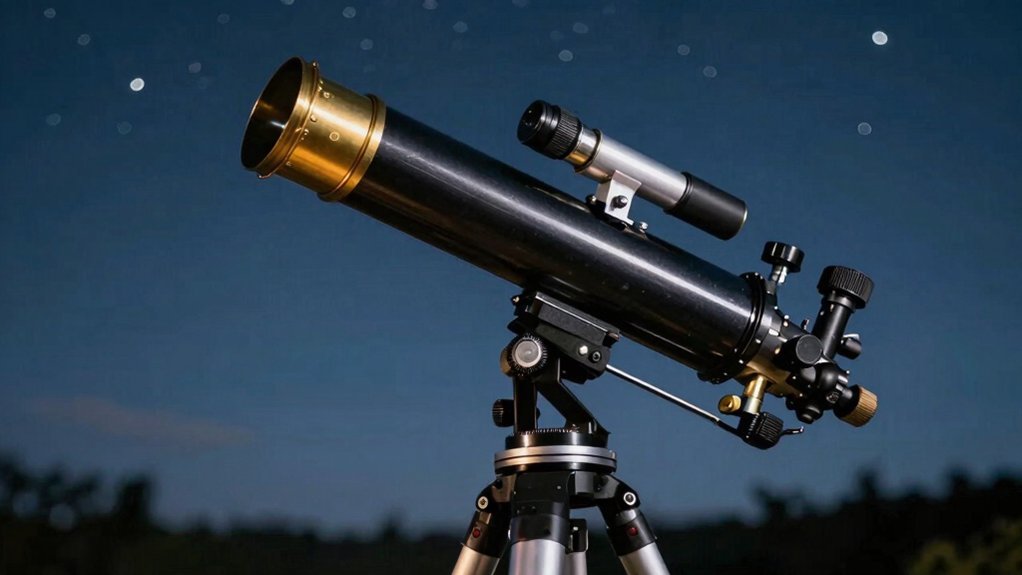
You think it’s just a big tube on a box, but you’re actually looking at the smartest shortcut to deep-sky viewing. John Dobson designed this Newtonian reflector with a simple rockerbox mount, letting you point easily like a camera tripod. You get massive light-gathering power, where an 8-inch mirror reveals faint galaxies that smaller scopes miss. Obviously, you’ll nudge the tube manually to track stars, which limits photography but maximizes your visual budget. Keep scrolling to see if this trade-off fits your night sky goals.
What Defines a Dobsonian Telescope Design?
You’re probably wondering if a Dobsonian is a special kind of mirror or just a fancy stand. Actually, it’s both. The optical core is a standard Newtonian reflector, but the real magic lies in its unique mount.
Here’s the thing: Dobsonian features focus on simplicity and stability rather than complex tracking gears. You get smooth manual motion from a low-center-of-gravity rockerbox base. This design lets you point easily at faint galaxies without heavy motors.
Construction materials like plywood and laminate bearings keep costs low while maintaining rigidity. John Dobson started this trend in the 160s to make large apertures affordable for everyone. You aren’t buying premium metal parts; you’re getting raw light-gathering power.
Obviously, this setup favors visual observing over astrophotography. Your next step? Consider how this simple, portable package fits your backyard sky sessions.
How Does the Altazimuth Mount Function?
So, how exactly does this two-axis system get you looking at the stars? You simply move the tube up-and-down for altitude and left-and-right for azimuth. Think of it like a giant camera tripod that pans and tilts effortlessly. This intuitive design lets you point anywhere in the sky without complex polar alignment.
Now, let’s talk about telescope mechanics. A horizontal base rotates for compass direction while a vertical axis handles elevation. You adjust these separately to center your target, often using slow-motion controls for precision. Obviously, a level base guarantees your azimuth moves match the true horizon perfectly. Even with such simple mechanics, finding faint deep-sky objects still requires dark sky conditions away from city lights.
Here’s the thing: mount stability relies on placing that broad base on firm ground. The simple structure keeps weight low while maximizing steadiness during visual observation. You won’t fight wobbly legs or confusing settings when tracking objects manually. Just set it down, aim, and enjoy the view immediately. Unlike equatorial mounts, this design avoids the need for polar alignment before observing, making setup significantly faster for beginners. However, even with this easy setup, you still need to consider light pollution levels to ensure the best possible view of faint celestial objects. Ready to see why big mirrors matter next?
Why Does Aperture Size Matter Most?
You just mastered the mount, but now you’re wondering why mirror size beats fancy features every time. Here’s the thing: aperture importance rules visual astronomy because it dictates exactly what you see. Your main mirror’s diameter determines your light gathering power, which scales with the square of that size. A 10-inch mirror collects more than twice the light of a 7-inch scope. Obviously, more photons mean fainter galaxies pop into view while small scopes miss them entirely. Magnification without enough aperture just creates a bigger, dimmer blur instead of sharp detail. You need that extra light to resolve fine structures in nebulae or split tight double stars. Dobsonians deliver massive mirrors cheaply, prioritizing raw optical performance over complex mechanics. Remember, every two extra inches roughly doubles your capacity to detect faint objects. Don’t chase high power; chase aperture to reveal the universe’s hidden depths. Now, which specific deep-sky targets will this extra light actually show you? The light gain with bigger apertures is exponential, not linear. When evaluating different models side by side, understanding optics and performance helps clarify why a simple large mirror often outshines expensive, feature-rich alternatives. This fundamental relationship ensures that light gathering power remains the single most critical factor in selecting a telescope for deep-sky observation. While refractors use lenses to bend light, the mirror diameter in a Dobsonian directly correlates to its ability to resolve faint details that other designs might miss at similar price points.
Which Deep-Sky Objects Are Visible?
Where does that extra light actually take you? It reveals the deep sky, showcasing faint galaxies like Andromeda even under modest conditions. You’ll enjoy galaxy observing, though light pollution still hides faint outer structures, so darker sites help immensely.
Next, explore various nebula types. The Orion Nebula shows clear structure, while planetary nebulae like the Dumbbell reward higher magnification. Obviously, brightness varies, but your aperture gathers enough photons to make them pop. Using a UHC filter is advised to improve viewing conditions in light-polluted areas when observing these objects.
Star clusters shine brightly too. Resolve individual stars in the Hercules Cluster or sweep across the wide Pleiades. Dense clusters benefit most from your telescope’s large light bucket, which relies on a wide primary mirror to collect maximum light for faint targets. For optimal results with these faint targets, ensure your optics have a high-quality reflective coating to maximize light transmission. Unlike refractors that use lenses, this design avoids chromatic aberration to deliver sharp images across the entire field of view using a simple optical system.
Plan your sessions around seasonal targets. Summer offers rich fields in Sagittarius, while spring brings the Virgo galaxy cluster. Constellation-based planning guarantees you catch the best views each night.
Your Dobsonian transforms the night into a detailed map of cosmic wonders. Now, how does this design stack up against refractors?
How Does It Compare to Refractors?
That question about refractors pops up constantly when you’re weighing your options. You likely wonder which scope truly fits your stargazing needs best.
Optical differences define their core performance immediately. Dobsonians use mirrors to gather massive light cheaply. Refractors rely on lenses for sharp, high-contrast planetary views. Obviously, bigger mirrors reveal fainter deep-sky objects than small lenses ever could.
Usability features also separate these two distinct designs sharply. Dobsonian mounts offer incredible stability and simplicity for visual hunting. Refractors provide portability and require almost zero maintenance for your convenience. However, you must collimate Dobsonian mirrors occasionally to keep images sharp. Refractors stay aligned inside their sealed tubes without any fuss.
Choose Dobsonians for maximum aperture per dollar spent today. Pick refractors if you prioritize easy transport and crisp planetary details. Your specific observing goals ultimately dictate the right telescope choice now.
Why Is Long-Exposure Photography Difficult?
Although you might expect long exposures to just work, tiny vibrations often ruin your shots before you even notice them. Wind or a shaky hand creates camera shake that blurs stars instantly. You need rock-solid stability and remote triggers to stop this motion.
Now, too much light floods your sensor during those long minutes. Bright scenes overexpose easily without neutral density filters cutting the glare. You must lower ISO settings and narrow apertures to control brightness effectively.
Here’s the thing: exposure planning becomes a genuine puzzle requiring test shots. Histograms lie on rear screens, so you recalculate times constantly. Bulb mode handles durations past thirty seconds while filters change everything.
Motion control stays unpredictable since blur depends entirely on exact timing. Static subjects soften if your tripod shifts even slightly during capture. Noise also creeps in unless you use low ISO settings wisely.
Master these variables first, then consider which aperture sizes suit beginners best. Unlike complex equatorial mounts that require precise polar alignment to track stars, a Dobsonian telescope offers a simpler alt-azimuth design that is easier to set up but lacks automatic tracking for long-exposure astrophotography. Effective use of such instruments requires understanding that their alt-azimuth design inherently introduces field rotation, making them unsuitable for the extended tracking needed in deep-sky imaging without additional corrective equipment. Beginners should focus on crafting the perfect web page to document their learning journey and share these technical insights effectively.
What Aperture Sizes Suit Beginners?
Three main aperture sizes usually suit beginners best. You might wonder which size fits your new hobby. Entry level telescopes often start at 4.5 inches, capturing bright planets well.
Now, a 6-inch model offers the minimum practical Dobsonian for serious beginner astronomy. You’ll see sharp lunar craters and Saturn’s rings clearly. This size balances cost and portability perfectly for most folks.
Here’s the thing: an 8-inch aperture is the sweet spot you should consider. It reveals noticeably brighter deep-sky views than smaller options. You get more planetary detail if you can handle the weight.
Obviously, larger 10-inch scopes gather more light but demand extra care. Your best choice depends on what you can transport easily. Don’t pick a size that stays stuck in your garage.
Choose the largest aperture you can realistically carry and store. This design philosophy echoes the pioneering innovations of John Dobson, who prioritized large apertures on simple mounts to make astronomy accessible. Understanding light gathering power explains why these larger mirrors reveal fainter galaxies and nebulae that smaller scopes miss. Following a step-by-step walkthrough ensures you master the basics and get your setup right the first time. Next, you’ll need to learn how to align your new instrument.
How Do You Align and Set Up?
How exactly do you get your new scope ready without feeling lost? Start by placing the base on level ground before mounting the tube. Keep the eyepiece holder up top and tighten tensioning bolts just enough to hold firm. Obviously, you should assemble everything before dark so you don’t lose precious observing time. Attach the finder scope and remove dust covers from mirrors to ensure clear light entry. For optimal stability on uneven terrain, consider using adjustable feet to perfectly level your mount before observation begins. A sturdy foundation prevents vibrations that can blur your view, so ensure the ground beneath the rocker box is solid and free of debris.
Now, let’s tackle those essential alignment steps for your finder scope. Center a distant object in your main eyepiece first, then tweak the finder screws until crosshairs match. Repeat this whenever you transport your gear to guarantee accuracy every single night.
Finally, apply these practical collimation tips to sharpen your view. Adjust the secondary mirror tilt using small turns, then center the primary laser dot. Keep the tube horizontal while working to avoid dropping tools on your precious glass. Test on a bright star; symmetrical diffraction patterns mean you are ready to explore deep space. Understanding optical alignment is crucial because even minor misalignments can significantly degrade image quality at high magnifications.
What Are the Manual Tracking Limits?
You’re probably wondering how long you can keep a planet centered before it drifts away. With manual tracking, you gently nudge the scope to follow objects across the sky. This works great for visual observing, especially at low power where targets stay visible longer.
However, higher magnification shrinks your view, forcing faster adjustments to prevent drift. Obviously, this creates considerable astrophotography challenges for deep-sky imaging. You cannot take long exposures because stars trail in just one or two seconds. Planetary video stacking works better since high frame rates freeze the motion effectively.
Remember that smooth, slow pushes on firm ground improve your control considerably. Start with bright targets like the Moon to build your hand-tracking confidence. While an equatorial platform helps, standard Dobsonians rely entirely on your steady hand. Can you accept these limits for your specific observing goals? Understanding the altitude-azimuth mount mechanics clarifies why these telescopes lack the motorized tracking found on other designs, making manual intervention essential for keeping objects in view. Mastering these practical step-by-step techniques ensures beginners can get it right the first time.
Who Should Avoid Buying a Dobsonian?
Although Dobsonians offer incredible value, they aren’t the right fit for every stargazer. If you dream of capturing deep-sky images, astrophotography challenges will quickly frustrate your efforts. These scopes lack the automatic tracking needed for sharp, long-exposure shots without expensive upgrades.
Portability concerns and storage limitations also matter if you live in a small apartment. Hauling a massive tube up three flights of stairs gets old fast. You might struggle to find space for such a bulky instrument inside your home.
Automation preferences drive many buyers away from these manual designs. You must nudge the scope by hand, which clashes with desires for push-button GoTo systems. Versatility issues arise too, since terrestrial viewing remains weak compared to other telescope types.
Choose a different mount if you need an all-in-one solution for photography or travel.