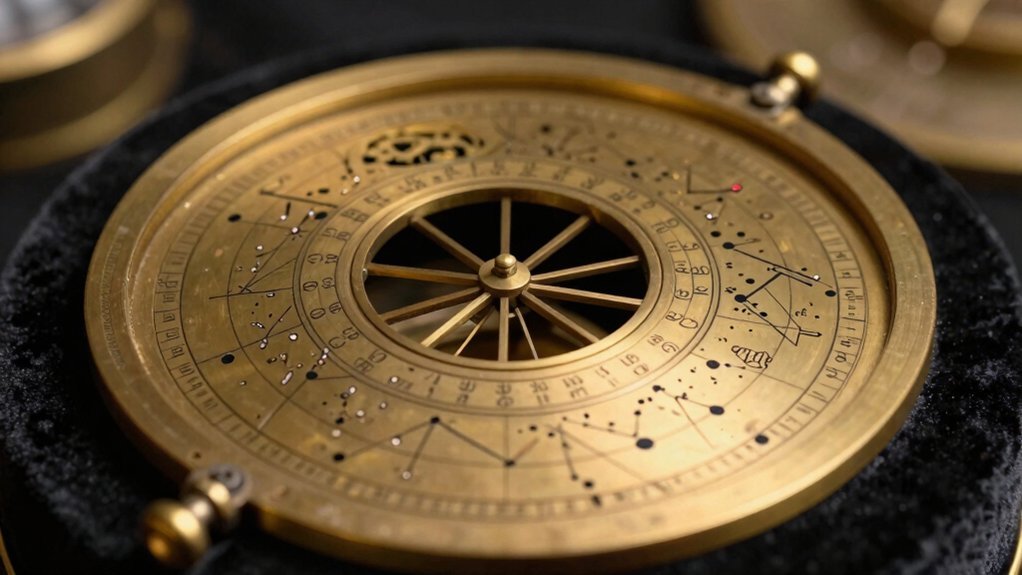
You’re wondering how to turn flat card into a working sky map, right? Cut your star wheel and sleeve precisely, leaving that center hole intact until the end. Now, fold the sleeve firmly and secure it with a split-pin through exactly 2mm holes for smooth spinning. Align tonight’s date with your time, then face north to match bright stars like Polaris. If you keep going, you’ll uncover exactly how to troubleshoot tricky alignment issues.
Cut and Prepare Your Planisphere Parts
Grab your scissors, because cutting these parts cleanly is the secret to a planisphere that actually works. You’re probably wondering why your last attempt jammed up. It’s usually rough edges or wrong paper.
Choose thin card for your template materials; it balances durability with easy handling. Master basic cutting techniques by following dotted lines precisely on both the star wheel and body frame. Don’t cut that center hole yet, or you’ll weaken the structure prematurely. Heavy paper ensures better durability for your constructed planisphere. Understanding paper weight is crucial because materials that are too thick can prevent the wheel from rotating smoothly within the frame. Just as telescope optics require precise alignment, maintaining the structural integrity of your planisphere components ensures accurate star mapping over time. Much like the revolutionary telescope that changed astronomy, the precision of your cuts defines the tool’s ultimate utility.
Slice out the viewing window carefully, starting with a tiny slit if needed. Smooth edges guarantee your stars remain visible without snagging later. Obviously, a jagged oval ruins the whole view.
Poke two-millimeter holes for your fastener using a sharp point, not scissors. Enlarge them gradually to keep everything aligned perfectly. Neat cuts now mean smooth rotation later.
Your parts are ready. Are you set to assemble them?
Fold and Secure the Cardstock Sleeve
You might wonder why your last sleeve cracked or felt too loose. Often, you simply didn’t press the scored line firmly enough before bending. Proper folding techniques create sharp creases that prevent cardstock from splitting under stress.
Now, shape your pocket by overlapping front and back layers carefully. The folded edge acts just like a book spine, holding everything together tightly. You need enough room for the disk to slide without snagging inside. This assembly method ensures the star wheel rotates smoothly within the frame to display visible stars for any hour of the night.
Secure those tabs with tape or staples near the marked points only. Avoid blocking the viewing window or hindering the wheel’s smooth rotation later. Strong fasteners boost sleeve durability considerably during repeated nightly handling outdoors.
Check your alignment by sliding the star wheel into its new home. Verify direction labels match the frame opening perfectly for accurate sky viewing. Your pocket should hold the disk snugly yet allow easy turning.
Ready to lock that wheel in place permanently?
Assemble the Wheel With a Fastener
Spin that wheel freely by installing a split-pin fastener through the exact center. You probably wonder how to keep it from wobbling while turning smoothly. Push the pin through the star wheel’s printed side first, then the body.
Ensure your fastener alignment is perfect before folding those metal legs down tight. Those center holes need to be exactly 2 mm for the best fit. If they’re uneven, your whole project will feel loose and frustrating to use. Expert enthusiasts recommend verifying that your cardstock thickness is consistent to prevent binding during rotation. Just as the legacy of a revolutionary telescope transformed our understanding of the cosmos, precise mechanical alignment ensures your personal instrument functions without error. Historical records show that the optical precision of such instruments was critical for mapping celestial movements accurately.
Now check your wheel rotation immediately after securing the joint. It must spin easily without binding against the cardstock sleeve underneath. Think of it like a door hinge; it needs to be firm yet fluid.
You’ve now created a stable pivot point for countless nights of stargazing ahead. Does the disk turn smoothly enough to set specific dates later? This assembly allows you to rotate the star wheel to align the desired date with the designated time for accurate viewing.
Set the Date and Time for Tonight
Two simple rings hold the secret to tonight’s sky, and you’re probably wondering how to sync them perfectly. You need the current date on the outer ring aligned exactly with your observation time inside. Just rotate the disc until October 15th sits directly opposite 9:00 p.m. for an instant match.
Here’s the thing: daylight saving time tricks your clock, so you must adjust manually before setting anything. Subtract one hour from your watch time if daylight saving applies, then set that standard time instead. A 9:00 p.m. summer viewing actually requires lining up 8:00 p.m. on your homemade device.
Now check the oval window to see stars matching your specific moment above the horizon. This precise pairing guarantees your chart reflects reality rather than a guessed approximation of the night. Get this alignment right now, because shifting even fifteen minutes changes which constellations appear visible tonight. Once aligned, the device displays the sky as it appears on the specified date. Remember that clear dark sky conditions are essential for seeing the fainter stars revealed by your correctly set planisphere. Understanding optical resolution helps explain why accurate alignment is critical when identifying faint celestial objects through any viewing instrument. Mastering these settings ensures you apply the same precision used in choosing a telescope to maximize your stargazing success.
Face North or South to View Stars
Now that your date and time are secured, you might wonder why the stars don’t match up yet. You’re facing the wrong way! For proper sky orientation, face north in the northern hemisphere or south in the southern hemisphere. This simple move fixes your chart alignment instantly.
Hold the planisphere upright so “North” stays horizontal when viewing northern stars. Flip it for southern objects, keeping “South” level. This guarantees correct horizon placement against the real sky. Your star visibility improves dramatically with this tweak.
Think of it as celestial navigation; you must face the direction you’re mapping. Tilting the chart east or west keeps everything accurate during astronomical observation. Don’t hold it flat like a book. Obviously, wrong angles reverse the patterns.
Mastering this split reveals the whole sky. You’ve got the right tools; now just turn your body. Ready to spot those bright beacons above? Understanding light pollution levels is also essential, as artificial glow from cities can wash out fainter stars and limit what you can realistically see even with perfect alignment. Just as early astronomers relied on key historical dates to refine their instruments, your modern observation benefits from aligning your body with the celestial sphere. To get the best view, find a location with dark sky conditions where the natural darkness allows even the faintest constellations to emerge clearly.
Match Bright Stars to Real Sky
How do you actually make those dots on the plastic match the twinkling lights above? Start by spotting the brightest stars first, since they act as your primary landmarks. You’ll find star identification much easier when you lock onto these brilliant beacons before hunting for dimmer ones.
Now, compare the distinct patterns on your wheel to the real sky overhead. Look for famous shapes like Orion or the Big Dipper to anchor your view effectively. This pattern matching forms the bedrock of successful celestial navigation for any beginner stargazer tonight.
All right, verify you hold the chart correctly so east and west align with your horizon. Rotate the dial until your facing direction sits at the bottom edge of the window. Only then will those plotted points truly reflect the actual universe spinning above your head. Understanding how optical aperture affects light gathering can help you realize why some faint stars on your map might remain invisible without proper equipment.
Focus strictly on bright anchors first, then expand outward to fainter neighbors gradually. Mastering this simple technique guarantees you won’t get lost among the countless stars later. To ensure accuracy, you must also consider the observing conditions such as light pollution and cloud cover that affect what is realistically visible in the night sky. Finding a location with minimal light pollution will significantly improve your ability to see fainter stars and match them to your planisphere.
Troubleshoot Common Alignment Issues
Even when you’ve matched the bright stars, the sky might still look wrong if your settings are off. You likely need latitude adjustments because a mismatched map distorts your horizon ring considerably. Obviously, wrong dates cause massive date shifts that slide constellations out of view entirely.
Now, check your direction correction by rotating the chart so your facing direction sits at the bottom. Don’t hold it flat like a book; lift it up to match the real sky. Your reference points like Polaris must anchor the center pin perfectly against the north celestial pole.
Here’s the thing: environmental factors like tall trees often block views that your clear printed horizon shows. Try simple calibration methods against known star patterns to spot clock errors or daylight saving mistakes. Fix these small setup glitches immediately before trusting any other part of your homemade tool. Understanding optical alignment ensures that your visual reference matches the mechanical setup of your observing instrument. Just as selecting the right telescope depends on optics and performance, your planisphere’s accuracy relies on precise mechanical calibration to reflect the night sky correctly. Different telescope designs offer varying levels of light gathering capability, which similarly dictates how much detail you can resolve once your planisphere has helped you locate a target.