You’re right to wonder what you’ll actually see, since photos often lie. Through a small scope, the Moon shows rugged mountains, while Jupiter displays dark belts and four bright moons. Stars remain tiny pinpoints, but double stars split clearly under steady skies. Nebulae appear as faint gray smudges, not vibrant clouds like in pictures. Larger apertures reveal more detail, turning fuzzy blobs into resolved star fields. Keep exploring to uncover exactly how your gear changes the view.
What Does the Moon Look Like in a Telescope?
Ever wonder why the Moon looks so different through a telescope than with your naked eye? You see a bright gray-white disk instead of just a smooth glow. Even a small 70mm scope reveals incredible texture immediately.
Now, low power shows the whole face, but crank up the telescope magnification. You’ll spot dark maria plains and rugged mountains casting long shadows. Craters pop out sharply near the terminator where sunlight hits at an angle.
Here’s the thing: full Moon light washes out detail, so wait for quarter phases. You can’t see flags, obviously, but rilles and crater chains appear clearly. Atmospheric turbulence limits how much zoom actually helps your view tonight. The clarity of these surface features is directly governed by the optical resolution of your specific instrument.
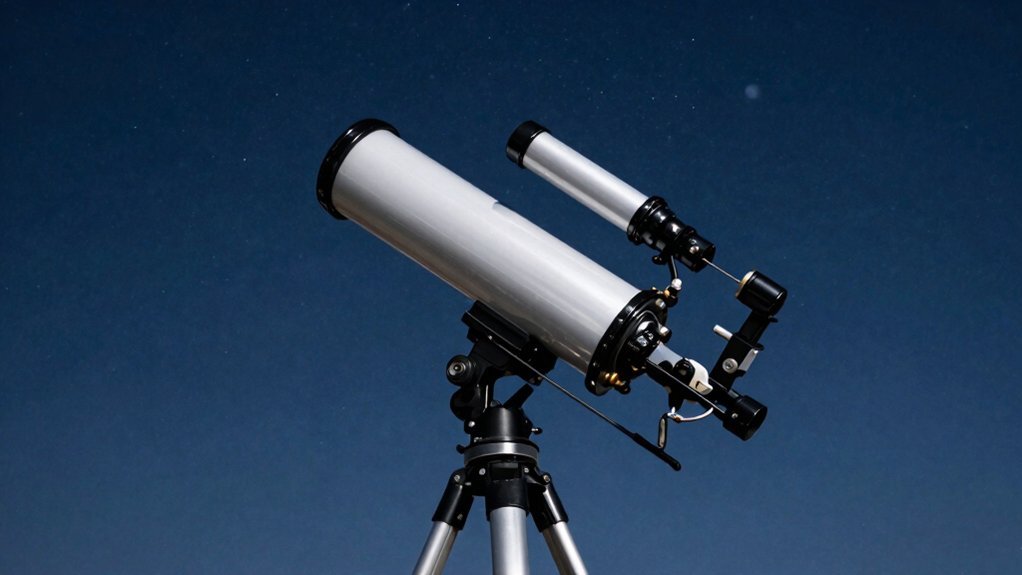
You’ll find that specific lunar features demand steady air more than huge glass. Start with fifty times per inch of aperture for sharpest results. While a beginner refractor captures the entire disk easily, a larger instrument like the C11 telescope provides superior detail in close-up views that cannot be replicated by cropping wider images. To get the best view, ensure you are observing from a location with minimal light pollution. Beginners should prioritize mastering proper setup to ensure their equipment performs optimally before expecting clear views. Ready to explore which planets show similar detail in your small scope?
Which Planets Show Detail in Small Telescopes?
Since you’ve mastered the Moon, you’re probably wondering which planets actually show real detail in your small scope. Jupiter steals the show with two dark belts and sometimes the Great Red Spot. You’ll easily spot its four bright moons dancing nearby too.
Mars offers polar caps and dark markings during close oppositions, while Saturn displays stunning rings. Venus and Mercury only reveal phases, lacking any surface features entirely. Uranus and Neptune remain tiny, featureless disks in most beginner instruments.
Different telescope types handle these views uniquely, but aperture isn’t everything for planet details. Steady air matters more than huge glass when hunting fine structures. Obviously, gas giants outperform rocky worlds for visual complexity right now. Focus your efforts on Jupiter and Saturn first for immediate gratification. Remember that atmospheric seeing often dictates the clarity of planetary features more than the telescope’s magnification power. High-quality optical coatings can further enhance contrast to make faint belts and spots pop against the dark sky. Understanding your instrument’s maximum useful magnification prevents you from pushing power too high and degrading the image quality. Ready to learn how colors and shapes appear on those specific worlds?
Seeing Colors and Shapes on Mars and Jupiter
Although you might expect solid colors, Mars and Jupiter actually display complex, shifting palettes that change with every rotation. You’ll spot rusty oranges and white polar caps on the Red Planet, proving Mars colors aren’t just one flat shade.
Now, look at Jupiter. Distinct Jupiter bands stretch across its face in creamy tans and deep browns. You can even see dark albedo features shifting on Mars as the planet spins beneath your lens.
Here’s the thing: filters really help you separate those hazy clouds from solid ground. A blue filter reveals atmospheric details, while red boosts surface contrast dramatically. Obviously, bigger telescopes show finer lines, but small scopes still reveal major shapes clearly. Mars reaches opposition once every 26 months, offering the ideal viewing opportunity to witness these surface details clearly. To maximize these observations, ensure your instrument has reached thermal equilibrium before viewing to prevent internal heat from distorting the image. Different optical designs offer varying levels of contrast and light gathering power, which directly impacts how sharply you can distinguish these planetary features. Maintaining stable atmospheric conditions is equally critical, as turbulent air can blur the fine details you are trying to observe.
You won’t see every mountain, yet you will witness dynamic weather systems dancing in real time. Keep watching, because these worlds never look exactly the same twice. Ready to learn why stars stay tiny?
Why Stars Appear as Pinpoints Instead of Disks
When you aim your scope at a bright star, you probably wonder why it stays a tiny dot instead of growing into a disk like Mars. The answer lies in immense stellar distance. Even huge stars sit so far away that their angular size remains too small for your telescope to resolve. You see a point source, not a surface.
Now, diffraction creates tiny optical patterns around that point. Your scope’s aperture spreads light into an Airy disk, which looks like a small circle but isn’t the star itself. Atmospheric turbulence often blurs this further, making stars twinkle or appear fuzzy near the horizon. Obviously, these spikes and halos are just artifacts from your optics or eye, not real physical features. The optical quality of your instrument also plays a critical role in how sharply these diffraction patterns are defined against the night sky.
You get brighter light and better separation of close pairs, but no surface details emerge. Remember, planets show disks because they are close, while stars remain unresolved pinpoints due to their vast remoteness. Visual diagrams help clarify how light diffraction creates these specific patterns rather than revealing actual stellar surfaces. Understanding angular resolution limits helps explain why even the largest amateur instruments cannot split a single star into a visible disk. Next, let’s explore how to spot double stars hiding within those bright points.
Spotting Double Stars and Star Clusters
How do you turn those blurry pinpoints into distinct pairs or sparkling swarms? You start double star observing by finding wide pairs first. A 4-inch scope splits stars 1.15 arcseconds apart under perfect skies. Tighter binaries need 100× magnification and steady air to separate cleanly.
Now, explore different star cluster types for varied views. Open clusters shine best at low power, showing many stars together. Globular clusters often need higher magnification to resolve their dense cores. Darker skies reveal far more members in these rich fields. The aperture size of your instrument fundamentally dictates the faintest stars you can detect within these clusters.
You’ll spot optical doubles aligned by chance, not gravity. Sketching helps you record separation and brightness for later comparison. Obviously, steady air matters more than raw aperture sometimes. Focus on moderate separations to improve your odds of success. To maximize your viewing potential, ensure you understand atmospheric stability before attempting to resolve the tightest binary systems. Understanding optical resolution limits helps you select the right eyepiece for splitting close pairs without losing image brightness.
Your next step involves hunting specific targets tonight. Grab your scope and try splitting that famous double star.
Viewing Nebulae Through Telescope Eyepieces
Two big surprises await you when you first point your scope at a nebula. First, you won’t see vivid colors; instead, everything looks gray or faint blue. Second, bright cores glow while faint edges often vanish completely into the dark sky.
Now, your eyepiece selection truly matters here. You need low power, like 30x to 50x, to keep images bright and wide. Large exit pupils between 3mm and 7mm help your eyes gather every possible photon effectively.
Here’s the thing: nebula filters block unwanted light and boost contrast dramatically. An OIII filter makes faint filaments pop against the background darkness instantly. Obviously, bigger apertures reveal more structure, but technique counts most. For instance, NGC 3242 displays a beautiful bluish-green color at 50x magnification, proving that specific conditions can reveal hues despite the general rule of grayness. Understanding light pollution levels in your area is also critical, as excessive skyglow can wash out these faint details regardless of your equipment. While reflectors often provide the cost-effective aperture needed to see these faint objects clearly, refractors offer superior contrast for planetary viewing. Achieving maximum contrast requires matching your optical setup to the specific surface brightness of the target.
Don’t crank up magnification too high or you’ll lose the faint glow entirely. Start low, add filtration, and let your dark-adapted eyes do the heavy lifting tonight.
Viewing Spiral Galaxies in Beginner Scopes
You might expect crisp, swirling arms like the photos you see online, but your beginner scope shows something different. Instead, you’ll likely spot faint smudges or bright cores. Even M51, a favorite target, often appears as just an elongated patch in smaller instruments.
Don’t despair, though. You can still detect traces of spiral structure with patience and dark skies. Use averted vision to catch those subtle hints of mottling or dust lanes. High magnification around 200x sometimes helps reveal hidden details once you center the galaxy. To maximize your view, ensure your telescope has fully reached thermal equilibrium with the night air to prevent internal air currents from blurring the image.
Here are some essential observing tips: start with M31 since it’s huge and easy to find. Remember that 6-inch scopes show hints, while 8-inch ones make arms pop. Your eyes need time to adapt, so keep looking steadily at that fuzzy spot.
Focus on finding the bright nucleus first, then hunt for texture. Ready to see how bigger glass changes everything? Understanding light gathering power explains why larger apertures reveal significantly more detail in these faint deep-sky objects.
How Aperture Changes Your Viewing Experience
That fuzzy smudge you saw earlier? A bigger aperture transforms it instantly. You gather more light, making faint galaxies pop against the dark sky. Obviously, light-gathering power grows quadratically, so small size jumps yield huge gains. For instance, a 200 mm telescope gathers 16 times more light than a 50 mm model, exponentially increasing your ability to detect faint objects.
Now, consider resolution. Larger mirrors separate tight double stars and reveal lunar craters sharply. You reveal true telescopic detailing that magnification alone simply cannot create. Without enough aperture, cranking up power just makes a blurry mess bigger.
Here’s the thing: aperture benefits shine brightest on deep-sky objects. You see intricate nebular forms previously hidden in smaller scopes. Remember, max useful magnification hits roughly 50 times per inch of diameter. Atmospheric turbulence often limits this, but more glass always helps.
You get brighter, sharper images across every target type. Focus on aperture first for the best viewing experience. Ready to see exactly what an 8-inch scope reveals next?
Details Revealed by an 8-Inch Telescope
An 8-inch scope finally answers your questions about what those fuzzy blobs really look like. You’ll see lunar features like Tycho’s rays and rilles casting sharp shadows near the terminator. Telescope resolution lets you spot details under one mile across when the air is steady.
Now, Jupiter displays cloud bands and the Great Red Spot while Saturn shows its Cassini Division. Mars reveals polar caps near opposition, though Venus only shows phases. Bright nebulae like Orion disclose core structures, and the Ring Nebula appears as a distinct disk.
You can resolve globular clusters almost to their cores and split colorful double stars like Albireo. Andromeda’s bright core emerges, with spiral hints possible under dark skies. Obviously, sky darkness dictates how much galaxy detail you actually catch.
This aperture reveals hundreds of targets, transforming vague patches into defined objects. Ready to push further into deeper space?
Deep-Sky Views in Large Amateur Telescopes
Since you’ve mastered the basics, let’s tackle how big scopes transform those fuzzy patches into detailed worlds. You’ll finally capture true galaxy detail, spotting dust lanes in Andromeda or the Sombrero’s bright core. Light pollution still hurts, but dark skies reveal spiral arms you previously missed entirely.
Nebula visibility explodes with aperture and filters. The Orion Nebula shows internal texture, while the Ring Nebula becomes a distinct, glowing donut. You need darkness here, as emission clouds fade fast under city lights.
A globular cluster like M13 stops looking like cotton candy. Your scope resolves individual stars around the edge, turning a blur into a glittering sphere. Even suburban skies show these dense stellar swarms well.
Rich star fields in the Double Cluster offer stunning color contrast. You see packed stars clearly, making wide-field views incredibly rewarding. Big telescopes truly reveal the deep sky’s hidden complexity now.