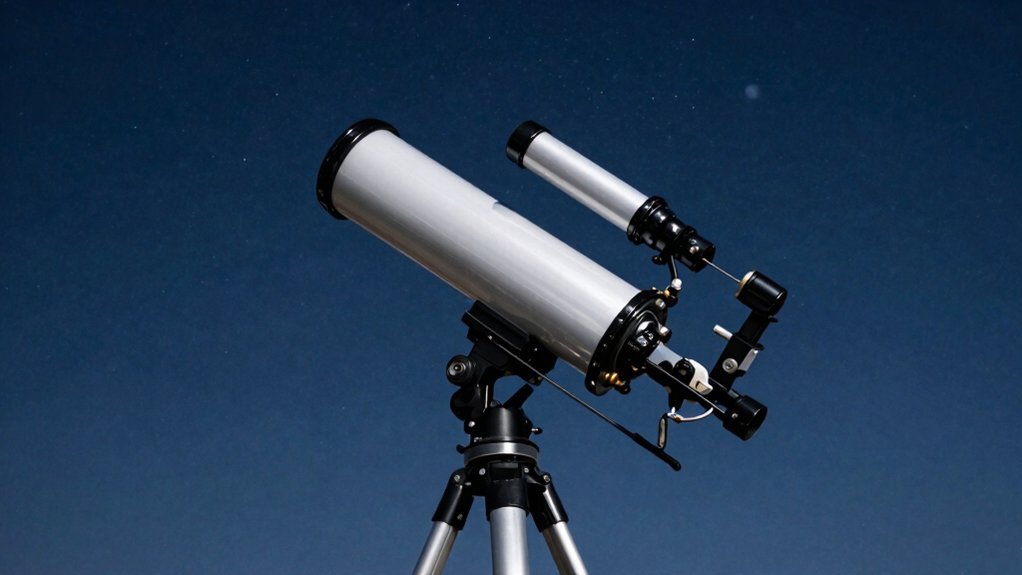
You’re frustrated because stars drift despite following the manual. Here’s the thing: you must level your tripod until both bubbles center perfectly before attaching the heavy tube. Balance the scope on both axes so motors don’t strain, then align your finder on a distant chimney during daylight. Input exact time and coordinates for GoTo accuracy, or the mount won’t know where to look. Master these foundational steps now, and you’ll soon achieve precise tracking for every celestial target.
Level the Tripod for Stable Polar Alignment
You’re probably wondering why everyone insists on leveling the tripod before you even look at the stars. It feels like extra work when you just want to see Mars. But here’s the thing: a wobbly base ruins your entire night. You need solid tripod stability right from the start.
Extend your legs and place a spirit level on the mount plate. Adjust one leg slightly, then rotate the level ninety degrees to check the other axis. Do this until both bubbles sit perfectly center. Obviously, visual guessing won’t cut it for precise astronomy. This careful process directly boosts your alignment accuracy later.
Recheck the level after you attach the heavy optical tube head. The added weight often shifts the legs slightly into soft ground. Secure those feet firmly so nothing rocks during your session. A flat foundation makes setting your latitude scale much simpler. Now you’re ready to point north and fine-tune everything. While leveling is not strictly necessary for the mount to function, it ensures consistent adjustments across both altitude and azimuth axes. Just as early revolutionary telescope designs required stable platforms to unveil celestial secrets, modern observations depend on this foundational step to prevent tracking errors. Different telescope models offer varying optical performance levels, but none can reach their potential without this initial mechanical stability. Understanding how atmospheric conditions affect visibility is also crucial, as turbulent air can distort views even with a perfectly leveled instrument.
Balance the Optical Tube on Both Axes
Loosen those lock knobs to free up your optical tube. You’re wondering why this matters so much before aligning anything. Here’s the thing: unbalanced scopes strain motors and ruin smooth tracking.
First, balance the right ascension axis with your counterweight shaft horizontal. Slide weights until the shaft stays put without drifting. Now, tackle the declination axis by loosening those tube ring locks. Adjust your tube orientation forward or backward until it holds steady. Ensure the optical tube is centered in the clamshell ring before securing it to achieve true balance on this axis. Properly distributing weight prevents gear wear and ensures smooth tracking throughout your observation session.
Obviously, balance importance cannot be overstated for stable viewing sessions. A perfectly balanced mount feels weightless when you nudge it slightly. Always keep one hand ready during these tests for safety. Tighten everything back up once both axes hold their positions firmly. Expert advice suggests that regular maintenance of moving parts further extends the life of your mount’s gears and bearings.
Your telescope now moves effortlessly across the sky without fighting gravity. Beginners should remember that dark sky conditions significantly enhance visibility once your equipment is properly set up. Ready to verify your finder scope actually points where you look?
Align the Finder Scope Using Daylight Targets
Now that your mount balances perfectly, you’re probably wondering how to actually find anything in the sky. Don’t worry, daylight alignment solves this puzzle quickly before nightfall arrives.
Which Distant Object Works Best?
You must choose targets like a distant chimney or license plate at least a quarter-mile away. Avoid the Sun entirely, as bright land objects offer safer, high-contrast aiming points. Obviously, farther targets reduce parallax error considerably for better precision later. For effective alignment, ensure your chosen target is located at least half a mile away to minimize aiming discrepancies. Selecting a target with high contrast against its background further ensures the crosshairs are visible and easy to align during the day. Understanding the specific optical design of your instrument can also help you anticipate how different targets will appear during this calibration process. Different telescope types, such as refractor optics, utilize unique light paths that may slightly alter how terrestrial targets appear compared to reflectors during this setup.
How Do You Match the Views?
Insert your lowest-power eyepiece first, then center that distant object sharply in the main view. Keep the telescope fixed while you adjust screws on the finder bracket slowly. Turn these thumbscrews incrementally until the crosshairs match your centered target exactly.
Verify alignment by checking a second distant object to verify consistent pointing accuracy. Your finder now mirrors the main telescope, making star hunting much simpler tonight. Next, you’ll need accurate time data for automated tracking systems.
Input Time and Location for GoTo Accuracy
Why does your telescope miss stars even after perfect balance? You likely skipped precise data entry. Your mount needs exact latitude and longitude, not just a nearby city name. Enter degrees and minutes carefully, ensuring you select the correct hemisphere. This specific location accuracy prevents huge pointing errors right from the start.
Now, let’s talk time. You must input the current local time and date exactly. Use the 24-hour format if your controller demands it, like entering 14:00 for 2 PM. Don’t forget to set your time zone offset correctly, ignoring daylight savings initially. Then, toggle the daylight saving setting only if it is currently active. A wrong choice here creates a fifteen-degree error.
Here’s the thing: time synchronization matters just as much as your coordinates. Both inputs work together to build an accurate sky model. Small mistakes here ruin your whole night. Double-check every number before slewing to your first target. The system will display a solar filter warning during this setup to ensure you do not look at the sun without proper protection. Remember that clear skies are just as critical as accurate data, since clouds or haze will block your view regardless of how perfectly the telescope is aligned. Selecting the right telescope optics ensures your instrument can resolve faint details once the GoTo system successfully locates your target. Understanding the history of pivotal telescope events reveals how critical precise alignment has been for astronomical discovery since the earliest observations. Ready to align that polar axis?
Point the Polar Axis Toward Polaris
Two quick moves get your equatorial mount facing the right way before you sweat the details. First, set your home position with weights down and tube north. Next, match your mount’s altitude angle to your local latitude using the adjustment bolts.
Now, look through the polar scope to find Polaris. You won’t center it blindly; instead, place it on the specific reticle mark. Use azimuth knobs to slide the star horizontally until it hits that spot. These basic polar alignment techniques guarantee your tracking stays smooth all night.
Here’s the thing: Polaris isn’t the exact pole, so the offset matters. Apply these celestial navigation tips to lock your axis precisely on the north celestial pole region. Tighten every knob securely once the star sits perfectly on the mark.
Your mount is now roughly aligned for serious observing. Ready to refine that accuracy with a two-star sequence?
Understanding the earth’s rotation helps explain why this precise alignment prevents stars from drifting out of view during long observations. Properly configuring the equatorial mount ensures the telescope counteracts this motion effectively for extended viewing sessions. This setup allows the single right ascension axis to track celestial objects smoothly by rotating parallel to the Earth’s spin.
Complete the Two-Star Alignment Sequence
You’ve got the polar axis locked, but you’re probably wondering how to make those GoTo commands actually hit the mark. Power up your scope and choose Two-Star Align from the menu. Accept your time and site data, then wait for the first prompt.
Pick two bright stars at least 60° apart for best results. This specific star selection directly boosts your overall alignment accuracy. Scroll through the list, center the first star in your eyepiece, and hit Enter. Repeat this precise process for the second target star.
The controller calculates a warp factor once you finish. Aim for a value between -0.5 and +0.5 to guarantee success. If the number looks wild, restart with wider separated stars immediately. Your telescope now knows exactly where it points in the dark sky. You are finally ready to hunt deep-sky objects with confidence. Understanding how mount tracking functions ensures your telescope maintains precise positioning on celestial targets after the alignment sequence is complete. Selecting the right telescope optics based on your specific stargazing needs can further enhance the clarity of the objects you locate following a successful alignment. Comparing different models side by side reveals how optical performance varies across price points and designs.
Verify Alignment Accuracy With Test Stars
Now that you’ve finished the sequence, you’re probably wondering if those GoTo commands will actually hit the mark. Good question. You need solid test star selection to verify everything works. Pick a bright star high above the horizon for your check. Avoid pairs sitting too close together in the sky.
Here’s the thing: your star centering techniques matter immensely. Use slow motions to place the star precisely in your eyepiece. Fast slewing ruins encoder readings instantly. Keep it centered long enough to judge tracking stability carefully.
Check your warp factor evaluation next. Orion systems show this number immediately after alignment. Values between -0.5 and +0.5 mean great alignment accuracy. Anything outside that range demands a complete restart. Obviously, repeated errors suggest bad initial choices or setup issues. Aim for under 30 seconds during the process to account for star movement and maintain maximum accuracy. Maintaining thermal equilibrium before starting ensures optical components have stabilized for precise pointing. Understanding optical resolution helps you distinguish whether a missed target is due to alignment error or the telescope’s inherent limits.
Retry with different stars if results fail. Trust your eyes before trusting the computer completely. Ready to find your first real target?
Slew to and Center Your First Target
That warp factor check probably left you wondering where to point next. Now, tackle your star selection by cycling through the controller’s object list. Pick a bright, familiar name when prompted, then hit ENTER to begin. Obviously, this known beacon simplifies your initial slewing process considerably.
Use the arrow buttons to move the optical tube toward that chosen star. Make large movements first, aiming to get the target into your finder scope’s view. Don’t worry about perfect centering yet; just get it close enough to see.
Once visible in the finder, switch to slower speeds for fine-tuning inside the eyepiece. Small corrections place the star exactly in the middle of the field. Press ENTER only after you confirm the target sits perfectly centered. Accurate alignment here guarantees reliable GoTo performance for every subsequent object you observe tonight. After the first star is confirmed, the system will prompt you to choose a second star to complete the two-star alignment procedure.
Correct Drift and Vibration During Tracking
Tackle that annoying star drift by checking your polar alignment first. You’ll see stars slide if your mount’s axis misses the celestial pole. Run a drift test near the meridian to spot azimuth errors.
Now, use that drift direction for precise drift correction. East-west movement means tweak your azimuth; up-down signals altitude issues. Small adjustments prevent overshooting and create smoother tracking paths. For the most accurate results, you should perform a drift alignment to ensure precision and significantly improve imaging quality.
All right, let’s talk vibration reduction for steady views. Tighten those tripod wing nuts and shorten legs to lower your center of gravity. Hanging a water jug between legs dampens breeze-induced shaking effectively.
Balance matters too; a slight bias keeps gears loaded better than perfect symmetry. Disengage clutches to check if your tube swings freely before locking down.
Your view should settle in two seconds, not ten. Grass often dampens vibration better than concrete does. Ready to try a long exposure shot?