Staring at a blurry mess? You probably skipped the one step that fixes everything: precise alignment. Set your scope on flat ground, then center a distant tree in the main eyepiece before adjusting the finder screws. Now, start with the Moon using low power to let your eyes adjust for twenty minutes. Never aim at the Sun without a proper filter, or you’ll risk permanent damage. Stick around, and you’ll master those tricky deep-sky targets next.
Assemble Your Bushnell Telescope on Level Ground
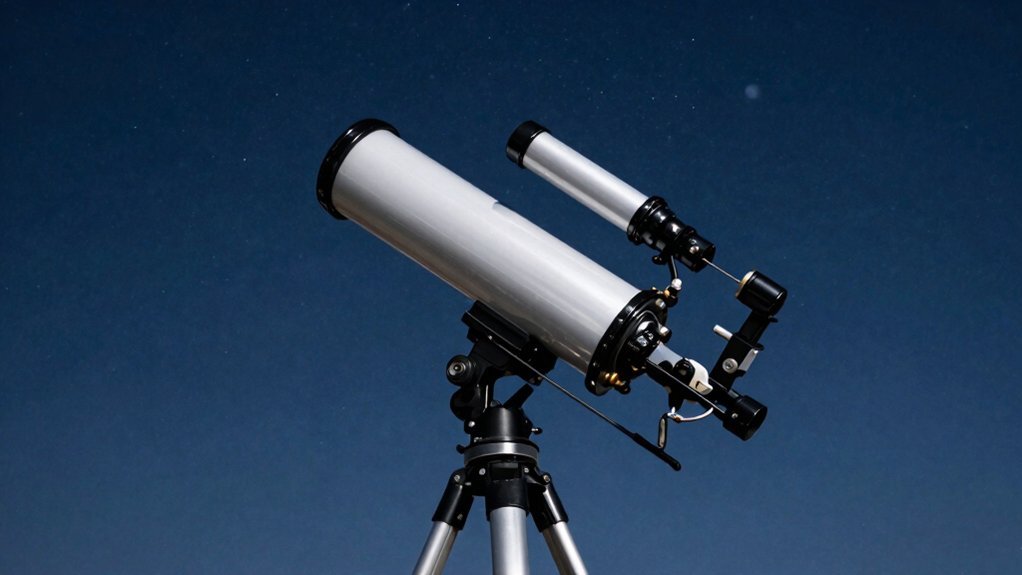
Since you’re wondering where to start, let’s get your Bushnell telescope on solid ground first. You need flat, level earth to stop annoying wobbles during your viewing sessions. Avoid hard concrete because it transfers every footstep vibration right up into your optics.
Now, focus on tripod positioning to guarantee maximum telescope stability for clear images. Extend all three legs evenly until they lock firmly without any rocking motion. Tighten those leg screws securely, but don’t strip the threads by forcing them too hard.
Here’s the thing: uneven ground ruins your alignment before you even look through the lens. Use a bubble level on the accessory tray to check your work quickly. Obviously, adding the heavy tube later might shift things, so recheck your level then. Proper alignment is crucial for effective targeting and significantly impacts the viewing experience, so ensure your setup allows for precise adjustment of the finder alignment. Different telescope designs offer varying levels of optical performance which can be compromised by an unstable foundation, making a steady base essential for any stargazer. Understanding how thermal equilibrium affects image clarity ensures your optics perform at their best once the temperature stabilizes. When preparing to clean your optics later, remember that removing dust with compressed air is safer than wiping, which can scratch delicate coatings.
Keep your setup area clear so you can move freely around the instrument. You’ll thank yourself when tracking stars becomes smooth instead of jerky and frustrating. Ready to secure the mount?
Align the Finder Scope Using Daylight Targets
You’re probably wondering why your stars keep vanishing the moment you look through the finder. It happens because your finder scope isn’t aligned with the main tube yet. Don’t worry, fixing this is easier than you think.
Pick a stationary object like a chimney or sign at least 100 yards away. Daylight makes spotting these distinct edges much simpler than hunting faint night objects. Center that target in your main eyepiece first using the lowest power lens. Lock the telescope tight so nothing shifts while you work.
Now, peek through the finder and tweak the adjustment screws until the crosshairs hit that same spot. These essential finder scope tips save hours of frustration later. Try different alignment methods if the dot drifts, making small turns only. Verify everything by checking both views again to confirm they match perfectly. Regular alignment is key for successful observing sessions.
Your telescope now points exactly where you look. Ready to sharpen those blurry views?
Focus the Main Eyepiece for Sharp Images
Two quick steps get you from blurry blobs to crisp details. First, master your eyepiece selection by starting with the 20 mm lens. This low power guarantees image stability and viewing comfort while you hunt for targets. Obviously, atmospheric conditions matter less when your field of view stays wide. Now, aim at a distant building over 200 yards away during daylight. Use your rack-and-pinion focusing equipment for slow manual adjustments until the image snaps. These specific focus techniques prevent you from overshooting that perfect point of optical clarity. Remember, magnification effects amplify blur, so nail this baseline before swapping lenses. Check if the view looks sharp immediately to protect your night vision later. Don’t rush; fine-tuning now saves frustration under the stars. Once focused, you’re ready to switch gears. What celestial object will you test first? Maintaining optical clarity throughout this process ensures that subsequent high-magnification observations remain productive and detailed. Always verify that your diagonal mirror is securely seated, as a loose connection can introduce vibration and degrade the sharpness you just achieved. Additionally, cleaning your optics with proper techniques prevents dust smudges from mimicking focus errors during observation.
Start Night Viewing With the Moon or Planets
Three simple choices kick off your first night under the stars without the usual confusion. You’ll want the Moon first since it’s bright and offers immediate visual feedback. Obviously, high contrast craters beat faint galaxies for your very first look.
Next, grab those bright planets like Jupiter or Saturn for testing your scope. You need low magnification initially because that wide view makes target finding much easier. Don’t ruin your night vision by using white lights; stick to red illumination instead.
Find a dark spot away from streetlights to maximize contrast and stability. Your eyes need twenty minutes to fully adapt to the darkness before you start. Use your finder scope to lock onto these glowing objects before peeking through the eyepiece. Since Bushnell telescopes often utilize refractor optics, understanding how light passes through lenses will help you manage color fringing on bright objects.
Start low, stay steady, and let your eyes adjust properly for success. Now you’re ready to center those targets before switching to higher power soon. Remember that accurate facts about celestial positions can prevent frustration when locating specific features on planetary surfaces. Understanding the optical performance of your specific model ensures you select the right eyepiece to maintain image clarity during these initial observations.
Center Targets Before Switching to High Power
You’ve got the target in view, but cranking up the power just made it vanish, right? This happens because high magnification shrinks your field of view drastically. You need solid target selection first. Pick a fixed object like a chimney at least 100 yards away. Obviously, distant poles work better than nearby trees for stability.
Now, start with your lowest-power eyepiece to find that wide field. Center the object sharply before touching any finder screws. Good alignment techniques require matching your finder to this centered main view. Adjust those small screws until the crosshairs hit the exact same spot. Understanding the relationship between focal length and magnification helps explain why starting low is critical for locating objects efficiently. The optical resolution of your telescope determines how clearly you can distinguish fine details once the target is properly centered. Always ensure your mount is on a stable surface to prevent vibrations from ruining your view before you begin fine-tuning.
Verify everything matches before swapping eyepieces. If the finder misses now, higher power will lose the target completely. Keep your scope steady while tweaking those thumbscrews gently. Double-check both views to confirm they agree perfectly on the target. For the most precise results, ensure your chosen target is actually at least half a mile away to minimize parallax errors during this process.
Master this centering routine now. You’ll save frustration later when you finally add those powerful lenses.
Add Barlow Lenses Only After Mastering Focus
Even when you’ve got a clear view, shoving in a Barlow lens too soon just turns your sharp image into a blurry mess. You need solid focusing techniques before tackling magnification sensitivity. Start with low-power eyepiece selection to lock onto your target easily.
Now, consider how the Barlow spreads the light cone inside your optical configuration. This change demands perfect telescope stability for true image clarity. Your initial settings must be sharp before you add any glass. Since these lenses double the focal length of your telescope, they inherently increase magnification sensitivity and require a more precise initial focus to avoid degrading the image quality. Keep in mind that atmospheric turbulence can significantly distort high-magnification views, making stable air conditions just as critical as your equipment setup. Understanding the exit pupil size is also essential, as adding a Barlow lens reduces this value and can make the image appear dimmer or harder to see if it exceeds your eye’s capability. Properly aligning your finder scope beforehand ensures that your high-magnification target remains centered and visible after the Barlow is inserted.
Here’s the thing: Barlow lens benefits only shine after you master focus. Adjust your setup to match your specific viewing preferences carefully. Don’t let extra power ruin a perfectly good night of stargazing.
Get that crisp picture first, then multiply your view safely. Ready to push your magnification even higher without losing detail?
Limit Magnification to 150x for Best Clarity
Most nights, pushing past 150x just turns your sharp view into a blurry mess. You might think more power equals better detail, but atmospheric turbulence often ruins image clarity before you reach high numbers. Sky stability dictates your useful magnification far more than your telescope’s size ever could.
Entry level telescopes especially struggle when you demand too much effective power from average optical quality. Moderate magnification actually boosts detail resolution because it works with your observing conditions instead of fighting them. Obviously, steady air matters more than cranking up the dial on your eyepiece. Stick to 150x to keep views crisp when the atmosphere shakes. This limit guarantees you see real features rather than fuzzy blobs. Now, try dropping your power down to find those hidden deep-sky gems. Understanding atmospheric turbulence is key to realizing why higher magnification often degrades the image rather than enhancing it.
Locate Deep-Sky Objects With Low Power
You just capped your magnification, so now you need to find those faint targets without losing them. Grab your lowest-power eyepiece, like a 25mm or 32mm, to widen that tiny field of view. This broader perspective makes spotting dim galaxies much easier before you zoom in later. A wider true field of view provided by low magnification is essential for framing large celestial structures that high power would cut off.
Now, try simple star hopping techniques to navigate the dark sky. Start at a bright naked-eye star, then follow geometric lines or triangles on your chart toward the target. Move slowly, checking patterns often so you don’t overshoot the object entirely. Utilize triangulation of nearby stars to precisely locate specific deep sky targets.
Obviously, dark skies help immensely, but good habits matter more right now. Use averted vision by looking slightly sideways to catch faint glimmers your direct sight misses. Tap the scope gently to make static objects pop against the background noise. Different optical designs offer varying levels of light gathering capability, which significantly impacts how easily you can detect these faint objects under less-than-ideal conditions. Always allow your telescope to reach thermal equilibrium with the outside air before observing to ensure the sharpest possible images.
Mastering this low-power approach builds confidence for harder hunts. Ready to guarantee your equipment stays safe while you observe?
Protect Your Eyes by Never Aiming at the Sun
Since you’re wondering how to stay safe while aiming, let’s clear up that confusion right now. Never point your Bushnell telescope at the Sun. Direct viewing causes permanent eye damage instantly. You need strict solar safety habits always.
Here’s the thing: ordinary filters won’t save your vision. Only use purpose-built front-aperture filters designed specifically for your scope. Never search using the finder either. Treat your optics like a magnifying glass concentrating harmful sunlight. Even a brief glance burns retinas severely.
All right, practice on land targets instead. Aim at a telephone pole 200 yards away during daylight. Keep your eye away until you confirm safe objects. Obviously, the Moon and stars are fine, but the Sun is not. Proper eye protection means total avoidance without exception.
Don’t leave your scope unattended in bright daylight. Accidental exposure happens faster than you think. Stay safe by choosing correct targets every single time. Now you know exactly what to avoid completely.
Recalibrate Finder Alignment When Targets Drift
When your targets drift off-center after a bump, don’t panic because your finder scope just needs a quick reset. You’ve likely experienced this annoying finder drift after transporting your gear or accidentally bumping the tube. It happens to everyone, so let’s fix it together right now.
First, lock your telescope mount tight to keep everything steady during this process. Center a distant object in your main eyepiece using a low-power lens for best results. Only then should you start your target redirection by tweaking the finder bracket screws. Understanding proper collimation ensures your optical system delivers sharp images once alignment is complete.
Make tiny adjustments with those three thumbscrews until the crosshairs match your main view perfectly. Large turns often overshoot the mark, so patience really pays off here. Verify your work by checking a second distant star to confirm total accuracy. To ensure the alignment holds under higher magnification, you should swap eyepieces to a higher power lens and repeat the centering process.
Your scope is now ready for serious observing without losing objects again. Ready to hunt for some deep-sky treasures tonight?