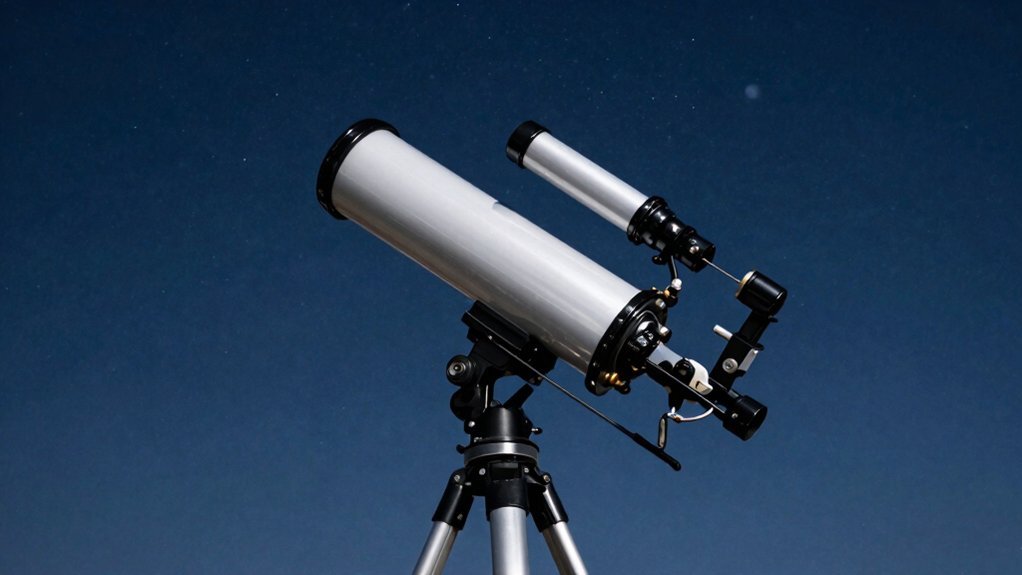
You’re struggling with shaky views because your Tasco needs solid leveling first. Set up on grass, not concrete, and extend tripod legs evenly for stability. Align your finderscope on a landmark 1,000 yards away before nightfall. Now, insert your lowest-power eyepiece and focus gently until stars shrink to crisp points. Use slow-motion knobs to track drifting objects without shaking the tube. Master these steps, and you’ll quickly see why your previous attempts failed.
Check Level Ground and Avoid Window Distortion First
Before you even unpack your eyepieces, let’s talk about that shaky view you’re probably blaming on the optics. You likely set up on a concrete driveway or wooden deck, which transmits every footstep directly to your scope. Obviously, this kills your setup stability before you even look at the moon.
Now, never point your telescope through a window glass. Those panes introduce distortion and reflections that ruin image sharpness instantly. You need an open area away from buildings to achieve ideal observing conditions tonight.
Here’s the thing: a level base keeps your mount consistent during focusing and tracking. Use a spirit level or even a ping-pong ball to check your ground. Stable footing reduces shake, making high-magnification views actually usable for you. Setting up on solid ground further ensures that minor movements do not translate into major image shifts during observation.
Start with a clean, distortion-free line of sight outside. Ready to lock down those legs for perfect balance? Expert observers know that allowing your equipment to reach thermal equilibrium with the outside air prevents internal air currents from degrading image quality. Additionally, placing your telescope on grass surfaces rather than hard pavement can significantly dampen ground-borne vibrations that disrupt your view.
Extend Tripod Legs and Balance the Optical Tube
You’ve got the perfect spot picked out, but that wobbly view usually comes from uneven legs. Extend all three legs evenly to your comfortable height, then lock them tight. Obviously, mismatched lengths kill your tripod stability before you even start observing. Most tripods feature extendable and retractable legs that must be manipulated uniformly to ensure a strong and stable setup. Setting up on a level surface further minimizes vibration and ensures the tripod legs maintain consistent contact with the ground. Just as a stable foundation is critical for construction, ensuring your base is solid prevents structural instability that could ruin your viewing experience. Avoid placing the telescope on surfaces prone to shaking, such as wooden decks, because ground vibration can travel up the legs and blur the image even with a perfectly balanced tube.
Now, mount the tube and check its balance carefully. Slide the counterweight along the rod until the scope stays put when released. Good tube balance stops drifting and saves your mount from unnecessary strain.
Tighten every screw once everything feels solid and steady. You need this foundation secure before aiming at any stars. Ready to line up your finder scope next?
Align Finderscope on Distant Daytime Landmarks
Since your main scope shows a tiny slice of sky, you’ll need that little finder scope to actually locate anything. You’re probably wondering how to line them up perfectly without getting frustrated. It’s simpler than you think if you pick the right spot first.
Which Target Works Best?
Smart target selection means choosing a stationary object like a radio tower or distant building. Aim for something at least 1,000 yards away and high above the horizon. This distance mimics real stargazing conditions better than nearby trees ever could. Obviously, a clear day makes spotting these landmarks much easier for you. Understanding the optical magnification differences between your finder and main tube helps explain why this precise alignment is critical for successful viewing. A properly aligned finder eliminates the frustration of scanning vast areas of the night sky blindly. Selecting a telescope with stable mounting systems ensures your alignment remains accurate even after moving the instrument to a new position.
How Do You Adjust It?
Center that landmark in your main eyepiece first, then lock the mount tight. Now, start the adjustment process by loosening the finder screws slightly. Turn them gently until the crosshairs sit squarely on your chosen target. Tighten everything back up while keeping that object perfectly centered in both views. Double-check with a second distant object to verify your alignment holds true. You’re now ready to find stars easily tonight. To ensure precise focus during this daytime setup, you may need to insert the extension tube if the image appears blurry in the eyepiece.
Insert Low-Power Eyepiece and Secure Finger Screw
Now that your finder is locked on, you’re probably wondering which eyepiece to grab first. Grab the one with the largest number marked on it. This specific eyepiece selection gives you a wider field of view, making targets much easier to spot. Obviously, starting low helps you find things before zooming in later.
Loosen the thumbscrew on your focuser tube completely before you try inserting anything. Your insertion technique matters here; push the eyepiece straight in until it bottoms out fully. Don’t leave it partially seated, or your image will tilt weirdly. If you use a diagonal, slide that in before the eyepiece instead. Always ensure your optical surfaces remain clean, as dust accumulation can significantly degrade image contrast and clarity even at low magnifications.
Tighten that finger screw firmly once the barrel sits securely inside the tube. You need it snug enough to stop slipping but don’t force it hard. A loose eyepiece ruins your viewing experience instantly when you move the scope. Now you’re ready to point at something and bring it into focus. Understanding how light gathering works explains why this initial wide view is crucial for locating faint objects before magnification reduces brightness. Remember that dark adaptation of your eyes takes about 20 minutes, so avoid looking at bright screens while setting up to maximize what you can see through that low-power lens.
Focus Main Telescope Until Target Images Sharpen
Turn the focus knob gently to sharpen that blurry mess. You’ve got a fuzzy view right now, and that’s totally normal. Stabilize your tripod first so vibrations don’t trick you into thinking focus is off. Tighten those mount locks firmly before you touch the knob.
Now, use small increments when rotating the dial. Overshooting happens easily if you rush this step. If the image gets blurry again, just reverse direction slowly. These simple focusing techniques guarantee you hit the sweet spot every single time. Watch for stars to shrink into tiny, crisp points of light. That’s your sign of perfect image clarity. For closer targets, move the focus tube away from the front of the telescope to achieve optimal sharpness. Remember that adjusting the focal length changes the magnification power and field of view available to your eye. Successful observation also depends heavily on finding a location with minimal light pollution to ensure the night sky is dark enough for clear viewing. Understanding the relationship between aperture size and light gathering capability ensures you select the right instrument for faint deep-sky objects.
Point at Moon for Easiest First Night View
Two big mistakes trip up most beginners on night one: skipping the Moon and grabbing the wrong eyepiece. You want clarity, not frustration, so let’s fix that immediately.
Why start with the Moon?
The moon importance lies in its brightness and ease of location. Point your scope roughly at the Moon before using the finder scope. Sweep slowly left or right until it appears in the finder field. Center it there first, then check the main eyepiece view. Observing the moon is the best way for beginners to familiarize themselves with telescopes and offers a deep appreciation for Earth’s nearest neighbor, helping you master the basics of lunar observation. Unlike faint deep-sky objects that require perfect dark sky conditions, the Moon remains clearly visible even when there is significant light pollution in your area. Starting with such a bright target allows you to practice collimating optics without the pressure of hunting for dim galaxies. Even in suburban areas, you can enjoy clear views by avoiding direct streetlights and allowing your eyes to adjust to the ambient light levels.
Which eyepiece should you use?
Grab the lowest-power eyepiece, usually marked 20mm or 25mm. This gives the widest field of view for easier targeting. Remove any Barlow lens now because it narrows your view too much. These beginner tips guarantee you actually see something tonight. Lock the mount once centered to stop shaking. Focus until craters look sharp and distinct.
You’ve got the Moon locked; now, how do you keep it there as Earth spins?
Use Slow-Motion Knobs to Track Drifting Stars
Since Earth spins, that sharp Moon image will drift out of view in seconds if you don’t act. You need slow-motion knobs for precise star centering and effective drift correction. These fine adjustments keep celestial movement smooth without shaking your mount stability.
Now, lock those axes tight before turning any cables. High eyepiece magnification shrinks your view, demanding quick re centering methods to hold targets. Obviously, tracking techniques work best when you start with low power first.
Here’s the thing: small turns fix drifting stars better than big pushes. Don’t touch the tube, or you’ll ruin your careful alignment instantly. Practice these moves on bright stars near the equator tonight. Note that the telescope utilizes right ascension and declination positions for tracking celestial objects, though noted stability issues in the mount may require additional adjustments for precise tracking. Expert observers recommend balancing the optical tube assembly to reduce strain on the mount gears during extended viewing sessions. Always ensure your tripod legs are fully extended and locked to prevent vibrations that can blur high-magnification views.
Mastering this control makes every observation session feel effortless and professional. Ready to stop chasing objects and start studying them deeply?
Troubleshoot Shaky Images by Settling Vibrations
Three main culprits usually cause that annoying wobble you’re seeing right now. First, poor tripod stability shakes everything. Tighten those wing nuts and shorten your legs immediately. Hang a heavy water jug between them for extra weight.
Next, check your mount rigidity carefully. Loose screws transmit every tiny touch directly to your view. Use vibration damping pads on hard concrete surfaces to stop ground tremors. Grass works better naturally for absorbing those nasty shocks.
Don’t ignore thermal settling either. Let your scope acclimate outdoors for thirty minutes before looking. Warm optics create blurry images until they match the cold air. Your observation technique matters hugely too. Tap gently and wait out the full settling time. Avoid touching the tube while focusing on faint stars.
You now know how to steady your shaky Tasco telescope view. Ready to tackle why some objects still look dim?
Recognize Small Aperture Limits on Faint Objects
You’re probably wondering why those faint galaxies look like ghostly smudges instead of sharp spirals. It comes down to aperture effects limiting your light collection. A small telescope simply cannot gather enough photons for clear faint visibility on deep sky targets.
Here’s the thing: contrast limits hide Nebula details when you push magnification too high. You must adjust observing expectations because color rarely appears in dim objects. Atmospheric turbulence often caps resolution before your optics do, making bigger glass essential.
Realize that 50mm scopes suit planets but struggle with anything dimmer. You need at least eight inches to truly resolve those distant, fuzzy structures. Accept these physical boundaries to enjoy clearer views tonight. Now, are you ready to optimize your current setup within these limits?
Repeat Alignment Practice for Clearer Future Views
If your finder keeps missing the mark, it’s because you haven’t locked in that daytime alignment yet. Pick a distant tower over 1,000 yards away and center it in your main scope first. Lock the mount tight so nothing drifts while you work. Now, adjust those finder screws until the crosshairs match your target perfectly. You will likely need to repeat this back-and-forth cycle several times for true precision. Practice consistency turns this frustrating chore into second nature quickly. Try swapping to a higher-power eyepiece to spot tiny remaining errors easily. Bright, fixed landmarks make these daytime drills much simpler than chasing dim stars. Obviously, stable targets help you identify alignment mistakes faster every single time. Mastering finder alignment now saves you endless hassle during future night sessions. Go grab your scope and start drilling on that distant radio tower today. Remember that proper setup requires you to clamp the declination axis to 90 degrees and ensure alignment with the needle for precise measurement before beginning your observation session.