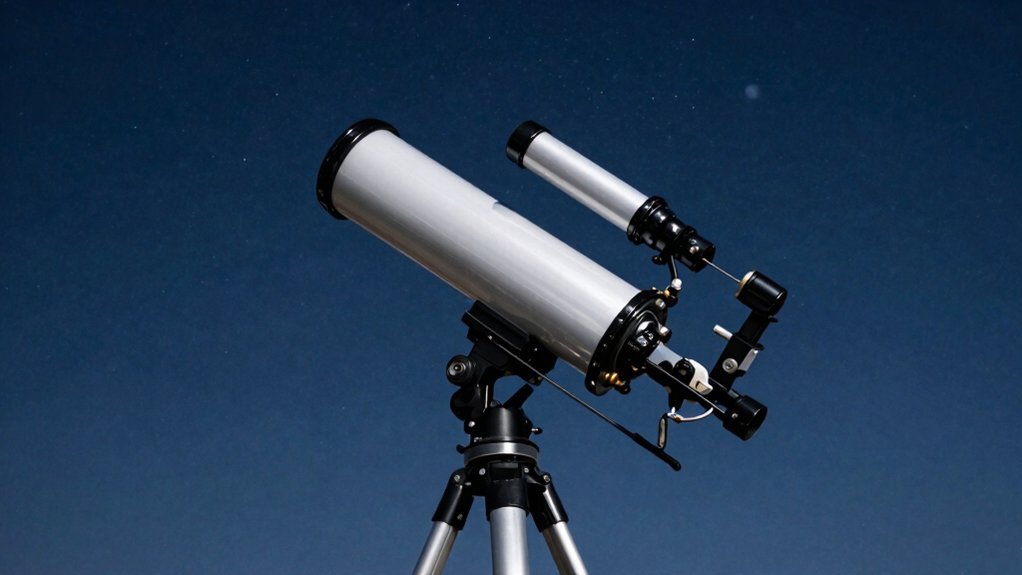
You’re wondering what the ends of a telescope are called because knowing the difference reveals how your scope actually works. The front is the objective end, acting like a light bucket, while you look through the eyepiece end at the back. Obviously, the objective gathers rays, and the eyepiece magnifies that focused image for your eye. Now you see why aperture size matters so much for brightness. Keep exploring to identify exactly how mirrors and lenses shape your view.
What Is the End of a Telescope Called?
You call the front the objective end because it holds the main optical components. In a refractor, this means a large lens sits right at that front spot. Reflectors use a primary mirror instead, but you still treat that aperture side as the objective end. Obviously, the opposite side is just the eyepiece end where you place your eye. Understanding these names helps you master basic telescope anatomy without getting lost in jargon. Now you know exactly which end does what before diving deeper into how they work. Ready to see how that front part actually gathers all that starlight? This front opening is known as the telescope aperture and determines how much light the instrument can collect. The size of this opening directly influences the image brightness and resolution you will experience during observation. Different telescope designs utilize specific optical systems to direct this collected light to your eye, affecting both performance and cost.
How Does the Front Objective End Gather Light?
You’ve got the names down, so now let’s tackle how that front end actually grabs starlight. You might wonder how a simple lens or mirror captures faint photons from deep space. Obviously, that front objective acts as your telescope’s primary light-collecting bucket for incoming rays.
Here’s the thing: parallel rays enter your tube and hit that main optical element immediately. In a refractor, the lens bends light; in a reflector, the mirror redirects it. This process drives essential light convergence toward a single focal point inside your scope. Without this step, you’d see nothing but darkness regardless of magnification power. Comparing different designs side by side reveals that each optical system handles this light path uniquely to suit specific stargazing needs.
Your objective’s area dictates total light collection capacity directly. Doubling the diameter quadruples the gathered photons because area scales with diameter squared. This massive increase lets you spot dimmer stars previously invisible to your naked eye. The objective forms a real image before your eyepiece ever magnifies anything. Remember, bigger objectives simply gather more fuel for your visual journey. Next, consider why size matters so much for clarity. Crucially, a larger aperture provides better angular resolution, allowing you to distinguish fine details on planets or separate close double stars that would otherwise blur together. To maximize this capability, enthusiasts often prioritize telescopes with a wider aperture to ensure superior performance under dark sky conditions.
Why Does Aperture Size Impact Image Quality?
Since you’re wondering why bigger scopes show more, let’s clear up that confusion right now. Your telescope’s aperture acts like a light bucket, gathering photons to reveal faint galaxies. More collected light directly boosts image brightness, making dim nebulae pop against the dark sky.
Now, consider resolution. A wider opening separates fine details, like splitting close double stars easily. This clarity improvement lets you see lunar craters sharply instead of as blurry smudges. Obviously, magnification alone cannot create detail your aperture misses; it just enlarges existing blur.
Here’s the thing: atmospheric seeing sometimes limits huge scopes on turbulent nights. Yet, generally, larger diameters deliver superior views by balancing signal and noise effectively. You’ll notice subtle contrast differences instantly with adequate aperture size. Crucially, the light gain with bigger apertures is exponential, not linear, meaning a 200 mm telescope gathers 16 times more light than a 50 mm model rather than just four times as much. Remember that optical quality remains vital, as poor glass or misalignment can negate the benefits of a large aperture. To maximize these gains, ensure your instrument achieves proper thermal equilibrium before observing to prevent internal air currents from degrading the view. Different telescope designs utilize specific optical configurations to direct this gathered light to your eye or camera.
What Defines the Objective Lens in Refractors?
That big glass at the front? That’s your objective lens, the heart of any refractor. You see, it’s the first element light hits, gathering photons from distant stars immediately. Obviously, this large convex glass defines your telescope’s entire optical function by bending rays to a focus.
Consider its specific lens characteristics next. You’ll find it usually combines two glass pieces to correct color errors effectively. Its diameter sets your aperture, directly controlling image brightness and detail resolution. A bigger lens demands a longer tube, so size matters considerably here. Expert observers often prioritize light-gathering power when evaluating how well a scope reveals faint deep-sky objects. The quality of the glass coating also determines how much light transmission reaches your eye, which is crucial for maintaining contrast against the night sky.
This primary component creates a real image inside the tube for your eyepiece to magnify. Without this essential front element, your refractor simply wouldn’t work as designed. Now you understand exactly what makes this specific end of the telescope so critical. When selecting a scope, understanding how aperture size impacts your viewing experience is just as vital as knowing the lens function. Ready to explore how mirrors handle this same job differently instead?
Where Is the Primary Mirror Located in Reflectors?
The big mirror at the bottom does the heavy lifting in your reflector. You probably wonder exactly where this essential glass sits inside that long tube. It rests firmly at the lower end, opposite the opening where light enters.
This specific primary mirror position defines the entire reflector telescope design you are using. Light travels down the tube, hits that concave surface, and bounces back up. A smaller secondary mirror near the top then redirects the focused image to your eye. Obviously, without this bottom-mounted mirror gathering photons, you would see nothing but darkness. Movement can disrupt this mirror positioning, requiring regular checks to ensure the optics remain aligned for optimal viewing.
Your telescope’s aperture depends entirely on this large, aluminum-coated disc at the base. It collects parallel rays and concentrates them precisely for your viewing pleasure. Now you know exactly where the magic happens within your optical instrument. This foundational component determines the instrument’s ability to resolve fine details through its light-gathering power. When selecting equipment, understanding the relationship between optical performance and cost helps match the right telescope to your specific stargazing needs. Different telescope types offer varying levels of this performance based on their optical design and price point, so choosing the right telescope is crucial for your journey. Next, let’s explore how the viewing end differs from the front opening.
How Does the Eyepiece End Differ From the Front?
You just learned where the primary mirror sits, so now let’s sort out the tube’s two very different ends. You might wonder why they look so distinct. Obviously, one gathers light while the other magnifies it for your eye.
The front end handles initial light transmission through a large objective lens or open aperture. It collects photons to form the raw image deep inside the tube. Conversely, the eyepiece function focuses entirely on enlarging that focused image for your viewing pleasure. You slide different oculars into this smaller end to change magnification levels instantly. While the front aperture remains fixed, you can swap these components to instantly alter the magnification levels.
Think of the front as a bucket catching rain and the eyepiece as a microscope examining the water. The front stays fixed, but you swap eyepieces to adjust your view. This clear division guarantees peak performance for both gathering light and inspecting details closely. Understanding the specific focal length of your optics is crucial because it determines the fundamental relationship between the aperture and the magnification you can achieve. The total power of the system relies on the precise optical path traveled by light from the objective to your eye. Diagrams often illustrate how light rays converge at the focal point before reaching the eyepiece. Now you understand how these ends collaborate to bring distant stars into sharp focus.
Why Do Some Telescopes Use a Diagonal Mirror?
Why does your neck ache when you point that scope straight up? You strain because refractors force you to look straight through the back. A diagonal mirror fixes this by bending light ninety degrees instantly.
Now, consider the real diagonal benefits beyond just saving your spine. This simple accessory lets you look down comfortably while tracking stars overhead. It transforms awkward angles into natural viewing positions for long sessions.
Here’s the thing about image orientation too. While astronomical views stay reversed left-to-right, diagonals often flip the picture upright. This makes terrestrial spotting of birds or landscapes much easier to interpret.
Obviously, Newtonians skip this since their eyepieces already sit on the side. But for your Schmidt-Cassegrain or refractor, this mirror is essential gear. You gain comfort and usability without changing your telescope’s core purpose. Choosing a quality diagonal also ensures high reflectivity to prevent image dimming and distortions caused by inferior optics. Understanding the specific optical path length introduced by different diagonal designs is crucial for maintaining proper focus across various telescope models. Successful observation ultimately depends on finding dark sky conditions that allow faint celestial objects to become visible to the naked eye and through your instrument.
What Role Does the Secondary Mirror Play?
That small mirror hanging in your tube’s throat actually does the heavy lifting. You might wonder how light reaches your eye so easily. This component redirects beams from the primary mirror straight to your eyepiece or camera sensor. Without it, you’d need to climb inside the tube just to see anything at all.
Understanding secondary mirror functionality clarifies why your scope stays compact. It folds the optical path, letting long focal lengths fit into short tubes. Good optical path management guarantees sharp images reach your detector without excessive bulk. Obviously, poor alignment here ruins your view instantly, so check it often.
Different designs use this trick differently. Newtonians send light sideways, while Cassegrains bounce it back through a hole. You gain convenience and portability thanks to this clever redirection. Now you know exactly why that tiny piece matters so much. Keep it clean and aligned for the best views tonight.
How Can You Identify the Front Versus Back End?
Now that you’ve sorted the mirrors, let’s clear up which end points where. You often wonder which side faces the sky during front identification. The front always points at your target object, like an open mouth eating starlight. In refractors, this end holds the big objective lens gathering all that light.
For back identification, just find where you actually look through the glass. This viewing end houses your eyepiece, diagonal, or camera connection point. Reflectors hide their primary mirror deep inside this rear section usually. You spot the focuser tube sticking out the side or back clearly.
Follow the light path from the open sky end straight to your eye. The front collects photons while the back delivers the focused image directly to you. Remember, the end with your accessories is always the rear section definitely. Now you can confidently aim your scope without mixing up those ends again.
Which End Most Determines Telescope Performance?
Ever wonder which end actually makes or breaks your view? You might guess the fancy computer backend, but you’d be wrong. The front end truly dictates your telescope’s ultimate performance limits.
Here’s the thing: that first component captures weak signals before any noise ruins them. Critical sensitivity factors like noise figure determine if you spot faint galaxies. If you lose signal integrity here, no amount of later processing fixes it.
Obviously, a weak front end creates bottlenecks that propagate through your entire system. Strong backend tools help analyze data, yet they cannot recover lost quality. You need low noise and high linearity right at the start.