You’re staring at a blurry mess because finding planets takes more than just aiming. Start on clear, dark nights and align your finder scope in daylight using a distant object. Begin with low-power eyepieces (20mm–40mm) to locate bright targets easily before centering them. Now, gradually swap to higher magnification only after sharpening your focus to reveal rings or ice caps. Stick with these steps, and you’ll soon discover the specific details hiding in plain sight.
Choose Clear Nights and Dark Skies for Best Planetary Views
You’re probably wondering why your telescope shows blurry blobs instead of crisp planetary bands. Here’s the thing: poor weather conditions often ruin your view before you even look up. Clouds block light, while high humidity softens details, so you need clear, dry nights after a front passes.
Obviously, light pollution from nearby cities washes out faint contrast too. Driving just a few miles away or waiting for the new moon phase creates the dark sky you really need. Aim for Bortle class 1–2 sites where city glow doesn’t interfere with your observation.
Now, plan your session between midnight and 3 AM when the sky is darkest. Check your local moonrise times to guarantee you have total darkness. Your eyes need twenty minutes to adapt, so use red light only.
Pick a remote spot on a moonless night for sharp views. Next, you’ll want to align your equipment before dark. Atmospheric stability increases late at night, improving the clarity of your planetary views. Additionally, allowing your optics to reach thermal equilibrium with the outside air prevents heat waves from distorting the image. Beginners should also consult a star chart to locate planetary positions before setting up their gear. Understanding how light pollution affects contrast can help you select the optimal viewing location for detailed planetary observation.
Align Your Finder Scope in Daylight for Easy Night Tracking
Two quick steps in daylight save you hours of frustration hunting planets later. You’re probably wondering why your telescope misses targets even when you aim carefully. Here’s the thing: your finder scope needs perfect alignment before nightfall.
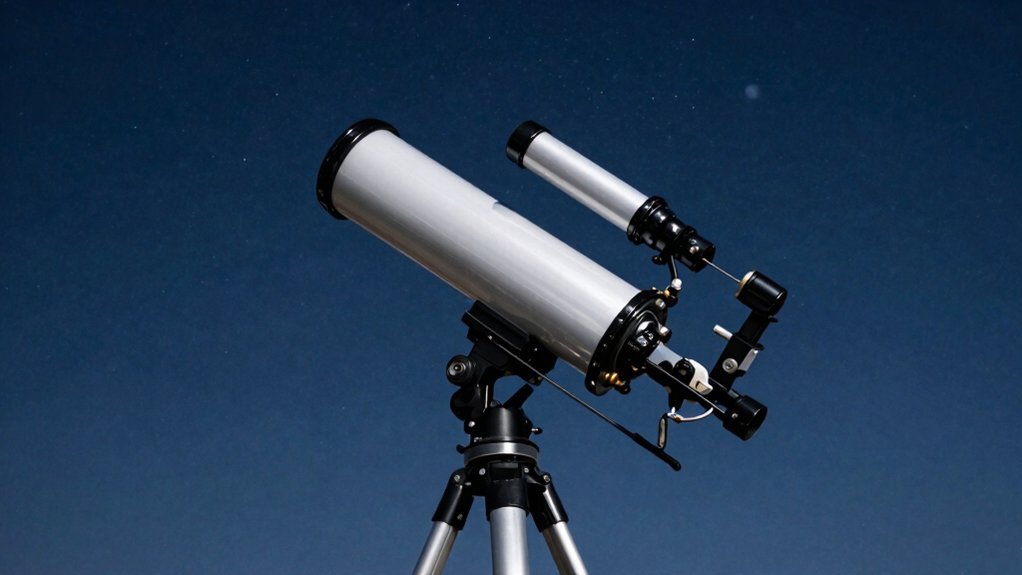
Pick a stationary object like a chimney tip at least 0.25 mile away. Center it in your main eyepiece first, then lock the tube tight. Now, adjust the finder screws until that same point sits dead center. This daytime alignment guarantees your optics match perfectly while landmarks remain clear and fixed. There are two main types of finder scopes, optical and red dot, that both require this precise calibration. Maintaining this setup ensures optical collimation remains stable for accurate celestial navigation. Properly aligning these components maximizes your light gathering capability by ensuring the optical path is unobstructed and directed correctly. Understanding how focal length affects your field of view helps you appreciate why this initial alignment is critical for locating small celestial bodies.
Don’t rush those tiny screw turns; overshooting ruins your finder scope precision. Check the main view again to confirm the target hasn’t shifted during adjustment. Repeat this process until both views align exactly on the distant point.
You’ll spot planets instantly once darkness falls because your finder now trusts your main tube. Ready to actually see something bright? Next, you’ll grab your lowest power eyepiece to locate those glowing dots.
Start With Low Power Eyepieces to Locate Bright Planets
Three simple reasons make low-power eyepieces your best friend for finding planets. They give you a wider sky view, brighter images, and faster acquisition. You’ll spot those bright dots easily without fighting tiny pointing errors.
Your eyepiece selection matters here; grab anything from 20 mm to 40 mm. This range frames multiple objects, so you won’t lose the target near the edge. Obviously, starting wide beats hunting through a narrow, shaky high-power tunnel immediately. Unlike high-magnification setups that amplify hand tremors, lower magnification provides a stable image that is much easier to track while scanning the heavens.
Smart viewing techniques mean you begin with that long focal length first. Confirm the planet sits centered before you ever think about swapping glass. If your scope uses 1.25-inch barrels, just check your fit before inserting it.
You need that steady, wide view to lock onto your target securely. Understanding effective aperture helps ensure your telescope gathers enough light to make these initial low-power views clear and distinct. Now that you’ve found it, are you ready to bring it into sharp focus?
Remember that optical alignment is critical before observing, as even a slightly misaligned telescope can make locating planets frustratingly difficult despite using the correct eyepiece.
Center the Planet and Sharpen Focus Before Adding Magnification
Lock that bright dot dead center before you even think about swapping eyepieces. You’re probably wondering why your planet vanishes when you zoom in. Here’s the thing: high power shrinks your view drastically. If the target isn’t perfectly aligned, you’ll lose it instantly. Use precise centering techniques to keep it stable.
Now, sharpen that blurry image immediately. Poor focus makes accurate alignment nearly impossible. Try these focusing methods: turn the knob slowly until sharp, then overshoot slightly and return. This finds the exact sweet spot. Obviously, a crisp low-power view beats a fuzzy high-power one every time. Employing a Barlow lens enhances magnification but requires refocusing for clarity. Remember that atmospheric turbulence can distort the image, so wait for moments of steady air to achieve the best focus. Selecting a telescope with a larger aperture size will gather more light, providing brighter and sharper planetary details even at higher powers. Different optical designs like reflectors and refractors offer varying levels of contrast and color correction for planetary observation.
Don’t add magnification yet. You need a locked, sharp target first. Higher magnification narrows the field, making off-axis objects disappear fast. Keep your planet centered and crisp now. This stable base guarantees you won’t hunt blindly later. Ready to see those rings clearly?
Switch to High Power Gradually to Reveal Rings and Surface Details
You’ve got that planet centered, but you’re probably wondering why jumping straight to high power makes it vanish. The field of view shrinks instantly, kicking your target right out of the eyepiece before you even blink.
Start low, then make incremental adjustments to your magnification while checking sharpness at every single step. You’ll need to recenter and refocus after each change because the image plane shifts constantly with different powers. Remember that maximum useful magnification is roughly twice the telescope’s aperture in millimeters, so calculate your limits before swapping eyepieces.
Remember that atmospheric stability dictates your real limit, often capping useful views around 200× for a four-inch scope. Pushing beyond this threshold just creates a dim, blurry mess instead of revealing those coveted surface details. This phenomenon occurs because turbulent air currents distort the light path more severely as magnification increases. Understanding how thermal equilibrium affects your optics ensures the telescope tube isn’t creating its own internal turbulence that ruins the view. Different telescope designs, such as reflectors or refractors, handle these optical challenges with varying degrees of optical performance.
Trust your eyes; if the image wobbles too much, drop back down to a lower power immediately. Now you’re ready to hunt for those faint rings or polar ice caps hiding in the glare.