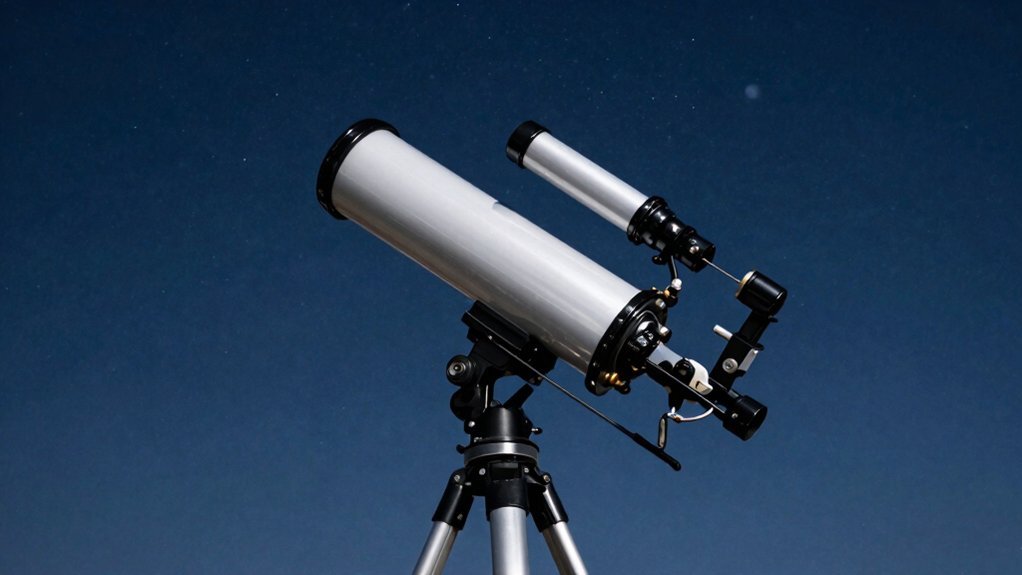
You’re wondering what an eyepiece actually does beyond just making things look bigger, and that’s the right question to ask. It acts like a magnifying glass for the image your objective lens already formed, projecting a virtual picture directly to your retina. Obviously, total magnification is simply your telescope’s focal length divided by the eyepiece number, so a 10mm piece zooms more than a 25mm one. Keep going to learn how specific designs fix blurry edges and save your eyes from strain.
What Is the Primary Function of an Eyepiece?
You’re probably wondering why that top lens matters so much when the objective does the heavy lifting. Here’s the thing: the eyepiece structure exists specifically to project that initial real image directly to your eye. It doesn’t create the picture from scratch but rather enlarges what the objective already formed for you.
Now, think of this component as the critical optical interface between the microscope’s internal mechanics and your retina. You see a magnified virtual image because this lens converts intermediate data into something your brain comfortably processes. Obviously, without this final step, those tiny details would remain invisible to your naked eye. By adjusting the focal length of the eyepiece, you can control the level of magnification applied to the image formed by the primary optics. This process ensures that the angular magnification provides a view that matches the resolving power of the main aperture.
All right, so its primary job is delivering a clear, enlarged view for your direct inspection. This partnership makes the unseen world visible through simple yet precise optical cooperation. Ready to see exactly how that magnification math actually works? In telescope optics, the eyepiece works in tandem with the objective lens to determine the final magnification power delivered to the observer.
How Does a Microscope Eyepiece Magnify Images?
Since the objective lens does the heavy lifting, you might wonder how the eyepiece actually boosts that image further. It works like a magnifying glass for the intermediate image formed inside the tube. You see, the objective creates a real picture first, and the eyepiece enlarges that specific projection for your eye.
Now, this second stage makes the virtual image appear much larger on your retina. Obviously, the total magnification is just the objective power times the eyepiece power. A 10x eyepiece paired with a 40x objective gives you a huge 400x view instantly.
Here’s the thing: shorter focal lengths in the eyepiece mean higher magnification numbers for you. But remember, boosting size doesn’t add new detail if the objective lens lacks resolution. The eyepiece simply expands what’s already there for easier inspection. While microscopes use this two-lens system, telescope eyepieces function similarly by magnifying the image formed by the primary mirror or lens to allow for detailed astronomical observation. Crucially, selecting the right eyepiece focal length allows observers to balance magnification with brightness and field of view for optimal results. Understanding that exit pupil size determines image brightness helps users avoid dim views when pushing for extreme magnification.
Which Magnification Levels Do Standard Eyepieces Offer?
How do you actually pick the right eyepiece from that confusing pile of numbers? You start by grouping them into three clear bands based on focal length. Low power eyepieces range from 20 mm up, offering wide fields for sweeping star clusters.
Medium power eyepieces sit between 10 mm and 20 mm, perfect for brighter galaxies. High power eyepieces drop under 10 mm to reveal crisp planetary details. Obviously, shorter focal lengths create higher magnification in your specific telescope. Different telescope designs handle these magnification ranges with varying degrees of optical clarity and light gathering ability.
But don’t ignore practical magnification limits when pushing for detail. You generally cap out at 50x per inch of aperture under average skies. A four-inch scope rarely exceeds 200x, regardless of the eyepiece you choose.
Now you know which numbers match your viewing goals. Next, consider how diopter adjustments might further refine that sharp image. Understanding optical resolution helps ensure you select an eyepiece that maximizes the clarity your telescope can physically deliver. Remember that atmospheric turbulence often blurs fine details before your telescope reaches its theoretical maximum magnification.
How Do Diopter Adjustments Improve Viewing Comfort?
With two eyes seeing slightly differently, you might wonder why one side of your view stays blurry. Your eyes often have unique refractive powers, causing mismatched focus between eyepieces. Diopter calibration fixes this by tuning each side to your specific visual acuity.
Now, you adjust the ring after setting the main focus wheel. This fine-tuning compensates for myopia or hyperopia without needing glasses every time. When both eyes receive sharp images, strain from unequal focus demand drops considerably. You stop squinting or constantly refocusing, which drastically reduces viewing fatigue during long sessions.
Here’s the thing: small corrections work best since the range is limited. Proper alignment guarantees your brain merges both views comfortably, preventing headaches. You simply set it once, then rely on the main focus for later changes. This separation makes your workflow faster and much more consistent overall. Selecting the correct eyepiece focal length further optimizes this comfort by ensuring the exit pupil matches your eye’s capabilities. Understanding how light gathering power affects image brightness can also help you maximize visibility when making these precise adjustments. Additionally, maintaining optical coatings on your lenses ensures maximum light transmission for the clearest possible view during these adjustments. Ready to check your own setup now?
What Optical Aberrations Affect Eyepiece Performance?
Even when you nail the focus, weird blurs or color fringes might still ruin your view. You’re seeing spherical aberration effects softening the center or chromatic aberration types painting false colors. Axial color hits the middle, while lateral color smears the edges with rainbow halos.
Now, look at those off-axis stars turning into comets or little lines. That’s coma and astigmatism wrecking your wide-angle views, especially on fast telescopes. Field curvature means you can’t focus the center and edge simultaneously, which frustrates everyone. Distortion bends straight lines, though scatter from internal reflections hurts contrast the most. High-quality optics often employ achromatic doublets to significantly minimize these color errors and improve image clarity.
Obviously, coatings help reduce that scattered light considerably. You need sharp on-axis detail and clean edges for serious observing. Understanding these flaws helps you pick the right glass for your scope. Next, you’ll wonder why designers build such complex eyepieces to fix these exact issues. Different eyepiece designs utilize specific lens configurations to correct these various optical errors effectively. Selecting the right telescope is equally critical, as the instrument’s optical quality determines how well these eyepieces can perform against such aberrations.
Why Do Telescope Eyepieces Require Specialized Designs?
You’re probably wondering why a simple magnifying glass won’t cut it here. Your eye can’t focus on the telescope’s raw intermediate image directly. The eyepiece must convert that real image into a virtual one you can see clearly. Without specialized eyepiece design, you’d just stare at a blurry, unusable mess.
Now, consider how critical precise optical alignment becomes for sharp views. Multiple lens elements correct defects while maintaining brightness across the entire field. A single lens simply cannot deliver the wide fields or comfortable eye relief you need. Different targets demand specific configurations to balance magnification with viewing comfort effectively. Just as clear observing conditions are essential for spotting faint stars, high-quality optics are required to resolve fine details without distortion. Selecting the right telescope types ensures your eyepiece performs optimally within the instrument’s specific optical path.
Obviously, complexity guarantees you actually enjoy observing rather than struggling with poor optics. This specialized approach transforms raw light into a usable, detailed picture for your eye. Expert observers recommend matching your gear to optical coatings to maximize light transmission and contrast for clearer views. Next, you’ll want to understand exactly how focal length drives your total magnification power.
How Does Eyepiece Focal Length Determine Total Magnification?
Since you’re wondering how a tiny number on an eyepiece changes your view so much, let’s clear that up right now. You calculate total magnification by dividing your telescope’s focal length by the eyepiece focal length. Obviously, smaller numbers here mean bigger views because the relationship is strictly inverse.
Here’s the thing: a 25 mm eyepiece on a 1000 mm scope gives 40x, but swapping to 5 mm jumps you to 200x. This math works regardless of specific eyepiece design, though optics affect image quality. Shorter focal lengths zoom in tight, while longer ones show wider sky patches. Keep in mind that pushing beyond 60x per inch of your mirror’s diameter often results in dim and blurry images. When selecting gear, understanding the differences in optical performance across various telescope types ensures you pair the right instrument with your observing goals. Additionally, matching the eyepiece to the telescope’s focal ratio helps maintain optimal brightness and field of view for different celestial targets.