You’re wondering which telescope actually uncovers faint galaxies, and the answer starts with grabbing an 8-inch reflector. You need dark skies because city lights wash out those fuzzy spirals just like streetlamps ruin a campfire view. Spring offers your best chance to spot the Whirlpool or Pinwheel galaxies high above. Obviously, bigger mirrors gather more light, but your location matters just as much for clear views. Stick around to unveil exactly how to find these distant islands yourself.
Choose Reflector Telescopes for Best Galaxy Views
You’re probably wondering why everyone insists reflectors are the go-to for spotting faint galaxies. It’s simple: bigger mirrors gather more light from those dim, spread-out cosmic clouds. You need every photon to see spiral arms clearly under dark skies.
Now, consider how different reflector types handle this task. Dobsonians offer huge apertures without breaking the bank, making them perfect for beginners. They deliver sharp contrast because they skip the color fringing that plagues other designs. For instance, an 8-inch Dobsonian provides impressive planetary views and substantial light-gathering power suitable for visual astronomy. Unlike refractors which suffer from chromatic aberration, reflectors utilize parabolic mirrors to focus all wavelengths of light to a single point for clearer images. The optical design ensures that light path efficiency remains high, allowing maximum brightness to reach your eye for detecting faint deep-sky objects. While refractors excel at high-contrast planetary viewing, their limited aperture often restricts the visibility of faint galactic structures compared to similarly priced reflector models.
Here’s the thing about your upcoming stargazing sessions. Apply these observing tips: prioritize portability so you can escape city glow easily. A collapsible tube helps you reach those essential dark sites faster. Obviously, setup speed matters when you’re chasing fleeting viewing windows.
Focus on aperture size above all else for maximum galaxy detail. Ready to decide exactly how much glass you really need?
Select an 8-Inch Aperture for Clear Galaxy Images
Two hundred millimeters of mirror might sound specific, but it’s the sweet spot you’ve been looking for. You probably wonder why size matters so much for faint smudges. An 8-inch aperture gathers 800 times more light than your eye, revealing hidden structure instantly.
Now, consider galaxy diversity. Smaller scopes show blobs, yet this size exposes spiral arms and dark dust lanes clearly. You see real shapes instead of vague gray clouds. Bright cores pop against darker outer regions effectively.
Here’s the thing about image capture. While visual observing differs from photography, this aperture provides the brightness needed for detailed sketches or camera sensors. You access magnitude 14.5 objects under steady skies. Obviously, atmosphere limits detail sometimes, but you gain essential contrast.
Start with low magnification to find targets, then zoom in. This balance offers portability without sacrificing deep-sky performance. You get substantial results without breaking the bank. Larger reflectors often require more complex mount stability to prevent vibrations from blurring those fine galactic details during high-power viewing.
Focus on aperture first to maximize visible detail tonight. Next, you must find truly dark locations to boost those faint views further. Understanding light gathering power ensures you select optics capable of resolving these distant cosmic islands effectively. Remember that optical resolution determines how finely you can distinguish star clusters within those faraway systems.
Find Dark Skies to Boost Faint Galaxy Visibility
Even with an 8-inch mirror, city lights wash out those faint smudges you’re hunting. You need skies darker than Bortle 4 to truly see galaxies clearly. Artificial glow destroys contrast, making deep-sky objects vanish completely from your view.
Now, consult dark sky resources to find remote parks like Cherry Springs or Big Bend. These protected reserves offer minimal light pollution and wide, open horizons for better viewing. Obviously, you must also check weather forecasts and verify site access before driving out.
Here’s the thing: elevation helps, but trees can still block your precious sightlines. Mastering these observing techniques guarantees you maximize every clear, dry night under the stars. Don’t let clouds ruin your trip after finding such a perfect location. Remember that allowing your eyes to adjust through dark adaptation significantly improves your ability to detect faint galactic structures.
To ensure success on your first attempt, you should follow a practical step-by-step walkthrough that covers essential preparation and execution. Your next step involves picking the right eyepiece to brighten those specific galaxy views. Choosing a location with low humidity further reduces atmospheric scattering, ensuring the faint light from distant galaxies reaches your telescope with maximum clarity.
Use Low-Power Eyepieces to Brighten Galaxy Views
You’ve found dark skies, but those galaxies still look frustratingly dim through your telescope. Low-power eyepieces fix this by boosting image brightness for extended objects. You need long focal lengths like 30mm to lower magnification effectively.
Now, consider your exit pupil during eyepiece selection. A range between 2mm and 3mm offers the best compromise for deep-sky views. Anything below 1mm makes galaxies too dim to see clearly. Obviously, wider fields help you locate faint targets before zooming in. This technique mirrors the approach used by revolutionary telescope pioneers who prioritized light collection over magnification to reveal faint cosmic structures. Understanding how optical aperture dictates the total amount of light entering the system is crucial for maximizing these low-power views.
Start with a 35mm eyepiece to frame large star fields easily. This approach brightens the view while keeping context around the galaxy. Don’t rush to high power until you locate your target first.
Your takeaway: prioritize low power to gather more light initially. Ready to learn when the sky offers the best views?
Selecting eyepieces that maximize light gathering power ensures even the faintest spiral arms become visible against the night sky.
Observe Galaxies During Spring and Summer Months
Three key months from March to May reveal the best galaxy views you’ll ever see. You might wonder why spring beats summer for spotting distant islands of stars. Earth’s orbit lifts galaxy-rich constellations high, slashing atmospheric interference that blurs faint details. Now, understand how seasonal patterns shift your target list from bright nebulae to deep clusters. You’ll spot diverse galaxy types like the Leo Triplet or Whirlpool Galaxy more easily now. Summer still works for early spring targets, but darkness remains your true ally. Obviously, light pollution kills these faint smudges, so chase moon-free nights far from cities. A six-inch Dobsonian gathers enough light to show cores and dust lanes clearly. Focus on objects near their highest point to maximize contrast and clarity. Your takeaway? Plan sessions between March and May for peak visibility. Ready to find specific neighbors like Andromeda next? Late April through June offers optimal viewing conditions as seasonal changes impact visibility. Understanding aperture size is crucial because larger openings collect more photons, making faint galactic structures visible against the night sky. Selecting a telescope with a large aperture ensures you gather sufficient light to resolve the faint details of distant galaxies that smaller instruments miss. While aperture drives light gathering, the optical design of your instrument further determines image contrast and sharpness when viewing low-surface-brightness objects.
Spot Andromeda and Triangulum With Binoculars
Two giant neighbors hide in plain sight, waiting for you to spot them with simple binoculars. You likely wonder how to find them without a telescope. Start at Mirach, then hop toward Mu Andromedae. M31 appears as a fuzzy white glow about two fields away. M33 sits further along that same line but demands darker skies.
Your success relies on mastering specific binocular techniques for galaxy observation. Use 7×50 or 10×50 models because they gather more light. Hold them steady since shaking hides faint smudges easily. M31 looks like an oval haze with a bright core. M33 remains a very subtle, diffuse ghost compared to its neighbor. You can also trace an imaginary line between Mirach and Almach to help locate the fainter Triangulum Galaxy.
Obviously, dark, moonless nights work best for seeing these distant islands. Light pollution washes out the contrast you need right now. Focus sharply until stars become crisp pinpoints in your view. Grab your gear and hunt these giants before the moon rises. To maximize your viewing potential, ensure you allow your eyes time for dark adaptation so they can detect the faintest details of these galaxies. Avoiding light pollution from nearby streetlamps is equally critical to maintaining the contrast required to distinguish these faint galactic smudges from the background sky. Beginners should also check online resources to confirm the moon phase before heading out, as a bright moon can significantly reduce the visibility of faint deep-sky objects.
Locate Whirlpool and Pinwheel Galaxies Easily
Two famous spirals await your discovery just beyond the Big Dipper’s handle. You’ll find the Whirlpool Galaxy by hopping southwest from Alkaid. This interacting system sits 31 million light-years away in Canes Venatici.
Grab your binoculars or a small telescope to spot these faint fuzzy patches. You can’t see them with naked eyes, but 8-inch scopes reveal spiral arms. Spring offers the best viewing conditions for northern observers hunting whirlpool galaxies.
Pinwheel galaxies also hide nearby, waiting for your dark-sky exploration. Just aim slightly west from the dipper’s end toward Cor Caroli. You’ll likely catch NGC 5195, the bright companion clinging to the main disk.
Obviously, steady air helps you distinguish those delicate structures clearly. Start your hunt tonight using Alkaid as your reliable guidepost. To maximize your chances of seeing these distant objects, ensure you observe under dark sky conditions that minimize light pollution and enhance contrast. Understanding how aperture size directly impacts light-gathering ability is crucial when selecting equipment to view such faint deep-sky objects.
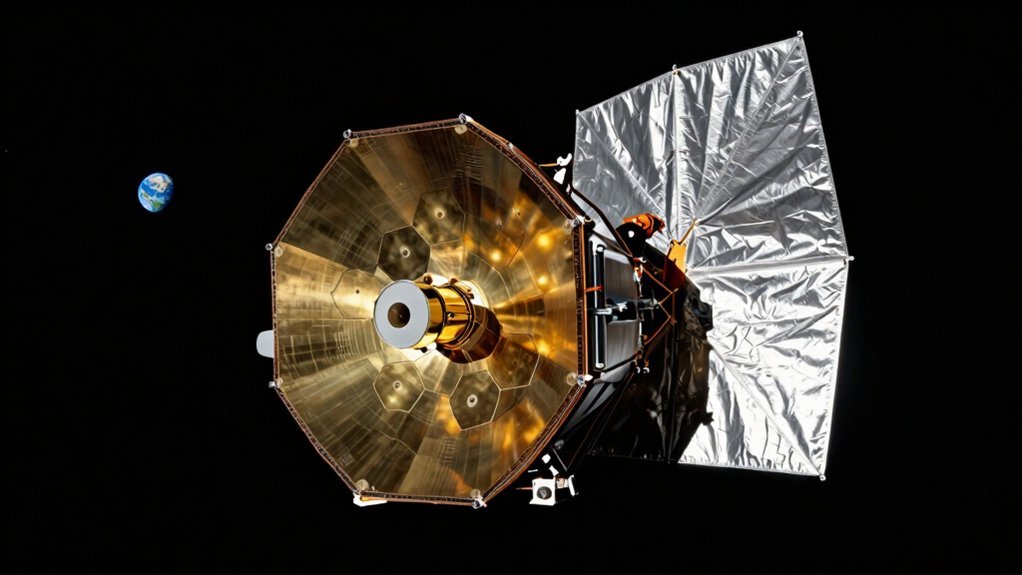
Understand Why Webb Telescope Sees Distant Galaxies
You’re probably wondering how Webb spots galaxies that Hubble completely misses. Infrared sensitivity reveals these ancient galaxies by catching stretched light from cosmic dawn. Obviously, redshift significance means distant objects glow brightly only in infrared wavelengths today.
Now, spectroscopy techniques confirm true distances by analyzing chemical fingerprints within faint starlight. You see specific elements like oxygen, proving galaxy formation occurred just 290 million years post-Big Bang. Webb’s massive mirror gathers this incredibly dim radiation that smaller telescopes simply cannot detect.
Here’s the thing: higher redshift values reveal earlier cosmic times with stunning clarity. Scientists study these bright, infant systems to understand how stars assembled so quickly after creation. Your curiosity about deep space now has concrete answers thanks to this advanced technology.
Ready to explore what aperture size actually means for your own viewing experience?
Prioritize Aperture When Buying Your First Telescope
Three key facts clear up the confusion about telescope specs right now. You need light-gathering power, not just high magnification claims. Aperture advantages include sharper details and brighter views of faint galaxies.
Avoid common beginner mistakes by ignoring empty magnification numbers on boxes. A 70mm scope works, but 8 inches reveals dimmer Messier objects clearly. Remember, you can change eyepieces later, but you cannot expand fixed aperture.
Balance size with portability so you actually use the instrument often. Aim for the largest aperture you can comfortably carry to your backyard. Obviously, a huge telescope gathering dust helps no one see distant stars.
Focus your research on aperture first, then check mount stability second. This approach guarantees better views than any marketing gimmick ever could. Now you know exactly what specification matters most for your journey.
Capture Hidden Galaxy Details via Astrophotography
You’ve got the right aperture, but your eyes still miss those faint galaxy arms hiding in the dark. You need long total integration time, often five or six hours, to reveal those ghostly structures. Single frames just won’t cut it for low-surface-brightness features like dust lanes or extended halos.
Now, apply stacking techniques to combine many exposures into one clean image. This boosts your signal-to-noise ratio considerably, making faint details pop against the sky glow. Check every frame for focus accuracy before you start combining them in software like Deep Sky Stacker.
Here’s the thing: bright cores blow out during long exposures. Use exposure blending to mix thirty-second shots of the center with longer frames for the outer arms. This preserves detail across the entire dynamic range without clipping highlights. You’ll finally see balanced structure from core to edge. Ready to plan your first multi-hour imaging session?