You’re staring at that spinning chart wondering why dates don’t match the sky. Obviously, you need to subtract an hour for daylight saving time first. Now, face true north and hold the map overhead so the horizon aligns. Match bright stars like Polaris to anchor your view, then hop to new constellations. Protect your night vision with red light to keep seeing clearly. Stick with these steps, and the rest of the sky will soon reveal itself for you.
Define Your Planisphere and Celestial Map
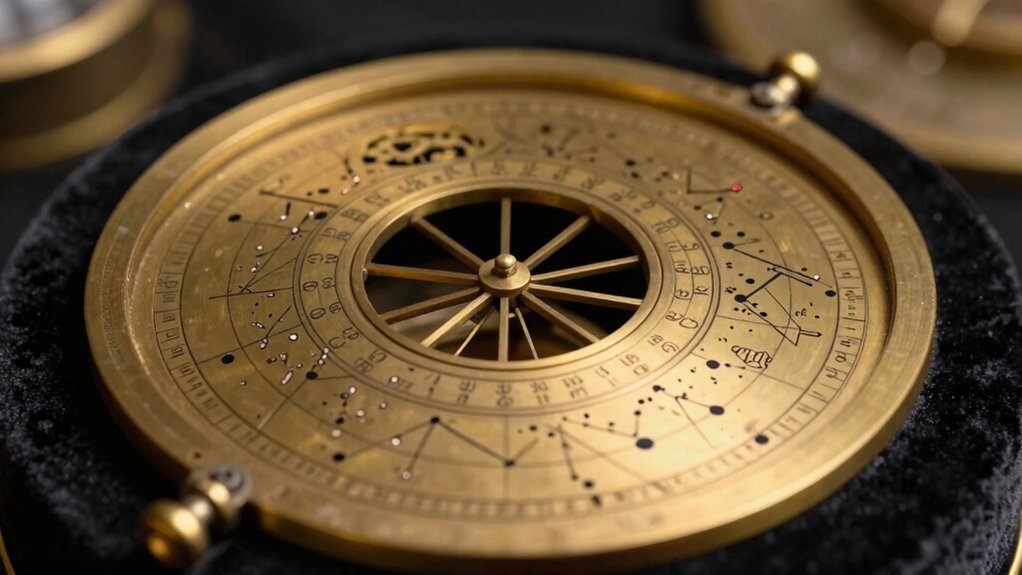
Confusion about those two spinning disks? You’re holding a planisphere, literally a “flattened sphere” representing the entire sky. These adjustable disks rotate on a pivot to mimic the heavens’ daily motion above you.
The lower disk holds your star map while the upper mask reveals only the visible sky. That oval opening acts as your horizon, showing exactly which constellations shine right now. Understanding these planisphere basics turns complex astronomy into a simple, handheld snapshot of the night.
You’ll use this tool for basic celestial navigation by aligning dates to find Polaris or Orion. Obviously, the center pivot matches the north celestial pole, anchoring the rotating chart for your latitude. Hold it up, match the directions, and watch the three-dimensional sky flatten onto paper.
Now you grasp how this portable device connects flat maps to real stars overhead. Ready to set your specific time and date for tonight’s viewing? To get the best view, ensure you are observing under dark sky conditions away from city lights that wash out fainter stars. Starting with the brightest stars helps beginners quickly orient themselves before attempting to locate fainter deep-sky objects. Successful observation also requires allowing your eyes to fully adapt to darkness so you can perceive dimmer celestial details that are initially invisible.
Set the Date and Time Accurately
Precision is your ticket to matching the plastic chart with the real sky above. You might wonder why your stars don’t match up yet. It’s usually just a simple setting issue you can fix right now.
Rotate the outer date ring until it meets your observing time on the inner scale. This date alignment guarantees the window shows exactly what hangs overhead tonight. Remember, time accuracy matters because Earth spins constantly, shifting star positions every minute. Once aligned, the planisphere shows the sky as it appears on the specified date.
Set your dial to local standard time, not your clock’s daylight saving reading. If it’s 10 PM in summer, turn the wheel to 9 PM instead. Verify both markers sit perfectly opposite each other before you step outside into the dark. Adjusting for time zones ensures the chart corresponds to your specific geographic location rather than a generalized regional time. Understanding how Earth’s rotation drives these apparent shifts helps you appreciate why even small timing errors can misalign your view of the constellations. Visualizing this celestial sphere movement clarifies why the stars appear to rotate around a fixed point while the chart remains static in your hands.
Your planisphere now reflects the specific moment you plan to watch. Ready to see if those settings hold up against the actual night sky?
Correct for Daylight Saving Time Shifts
Since your watch jumps ahead but the stars don’t, you’re probably wondering why the sky looks “wrong” tonight. You aren’t imagining things; your planisphere simply ignores daylight saving time shifts completely.
Most charts rely strictly on standard time for their celestial calculations. When clocks spring forward, you must perform a quick daylight correction to match reality. Just subtract one hour from your actual watch time before setting the dial.
If it’s 9:00 PM during summer, set your planisphere to 8:00 PM instead. The date stays exactly the same while you shift the time back. This simple math guarantees the star map aligns perfectly with the real sky above your head.
Obviously, skip this step entirely when standard time returns in winter. Always check your local rules first to avoid confusion later. Now that your time is set, are you ready to face north? Remember to apply this adjustment so the blue edge at the bottom correctly represents the northern horizon for your orientation. Understanding how celestial coordinates function will further enhance your ability to locate objects once your time is properly adjusted. Just as selecting the right telescope optics depends on your specific viewing goals, ensuring your time setting is accurate is fundamental for successful navigation. Properly accounting for these time shifts ensures that the optical alignment of your view matches the predicted positions on the chart.
Face North to Orient Your Star Chart
Two simple steps fix that “upside-down” feeling you get when first holding your planisphere. First, face true north using a compass or Polaris as your guide. This establishes the correct north orientation for your entire viewing session.
Next, rotate the dial until “North” sits at the bottom edge of the chart. Now, the stars near that bottom rim match the actual northern horizon ahead. You’re fundamentally aligning the map’s horizon with the real world right in front of you.
This baseline setup simplifies celestial navigation remarkably before you turn toward other directions. Obviously, keeping compass points aligned prevents confusion when identifying constellations later tonight. Your chart now mirrors the sky perfectly without any mental gymnastics required.
Start with this stable north-facing position to build confidence quickly. Once comfortable, you’ll easily rotate the planisphere to explore eastern or western views. For the best viewing experience, ensure you are using expert-backed guidance to minimize light pollution and maximize star visibility. Incorporating dark sky sites into your planning further enhances the clarity of the constellations you are mapping. Allowing your eyes to adjust to the natural darkness for at least 20 minutes will significantly improve your ability to discern fainter stars on the chart.
Hold the Map Overhead at Arm’s Length
You’re probably wondering why holding the map flat isn’t working. The sky is a dome above you, not a table surface. Holding it flat reverses east and west, confusing your entire view. You need to lift that chart high into the air immediately.
Extend your arm fully and hold the planisphere directly overhead. This overhead alignment places the chart in the same visual frame as the stars. Keep the cardinal directions on the rim matching the actual horizon below. Use the central pin to sight Polaris while maintaining a steady hold. Don’t let your hand wobble or tilt the disk randomly. A stable position lets you compare patterns without constant reorientation. Remember that stars rotate counterclockwise around the North Star, so your overhead view must account for this motion to match the sky accurately. Just as selecting the right telescope depends on understanding optical design to match your viewing goals, mastering this posture ensures your manual star chart functions as intended. Successful observation also requires allowing your eyes time to adapt to the darkness through dark adaptation before attempting to match faint star patterns. Different telescope designs offer varying fields of view and light-gathering capabilities, much like how a planisphere provides a broad overview compared to the magnified detail seen through optical instruments. Rotate your body, not the chart, when facing new directions. Now you see why arm’s length matters for accurate sky matching. Ready to find specific stars within that oval window?
Match Visible Stars to the Chart Window
Now that your arm is steady overhead, let’s fix that blurry view by setting the right time. Rotate the disk until your current date aligns perfectly with the observing hour. This specific setting accounts for seasonal changes, ensuring the window displays only the stars actually visible tonight.
Hold the chart so your facing direction sits at the bottom edge. The oval’s center represents your zenith, while the curved edges mark your horizon. Bright constellations inside this frame should mirror the real sky above you exactly. Visualizing this projection method helps clarify how the three-dimensional dome of the sky is flattened onto a two-dimensional map.
Obviously, stars near the window’s edge appear low, while central ones hang high. Match these bright landmarks first to confirm your orientation is correct before hunting fainter objects. If you turn your body, rotate the planisphere again to keep horizons aligned. Your chart must always reflect your specific viewing angle and moment. This process allows you to identify constellations effectively by comparing the map directly with the night sky. Unlike choosing telescopes which requires evaluating optics and cost, a planisphere offers an immediate, low-cost way to learn the sky. Selecting a model with durable plastic construction ensures your tool withstands outdoor conditions during frequent stargazing sessions. Ready to lock onto a specific guide star?
Find Polaris and the Big Dipper First
Confusion about which way is north stops many beginners cold. You need true north before starting any serious star identification. Face the Big Dipper, that familiar bowl with a handle hanging low. Its two outer bowl stars act as Pointer Stars for celestial navigation. Extend that imaginary line upward about five times their specific gap distance. You will hit Polaris, the steady North Star shining alone nearby.
Now, align your planisphere’s north mark directly with this bright pivot point. The central grommet on your chart represents this exact celestial pole perfectly. Rotate the disk until the grommet matches Polaris in your actual sky. This single move anchors your entire map to the real world above. Suddenly, east sits right and west rests left while you face north. You have now fixed your orientation for the whole night ahead. Ready to explore deeper patterns using this solid foundation? When viewing the northern horizon, you will see the Big Dipper positioned below the North Celestial Pole with Cassiopeia almost directly overhead. Just as a well-crafted web page guides visitors intuitively, this alignment ensures your star chart leads you correctly through the night sky. Consulting expert-backed guidance ensures you interpret these celestial movements with accuracy and confidence.
Star Hop to New Constellations Easily
Three simple steps turn that challenging sky into a manageable map. First, pick bright anchor stars near your target to start recognizable routes. You’ll use these well-known points to navigate complex celestial patterns easily.
Next, map your path using stepping stone stars between landmarks. Estimate angular distance with your fingers to match the chart scale accurately. This binocular technique helps you verify each small jump before moving forward. Star hopping is especially effective for telescopes with a narrow field of view.
Finally, practice constellations you already know to build confidence quickly. Repeat these hops until the movements feel automatic and natural for you. Obviously, starting with easy targets prevents frustration during your first few attempts.
You now hold the key to exploring deeper skies without getting lost. Grab your planisphere and try hopping to a new neighbor tonight. Where will your next stellar adventure take you?
Protect Night Vision With Red Light
You’ve mastered star hopping, but why does checking your chart suddenly make the sky vanish? White light bleaches rhodopsin in your eyes, destroying dark adaptation instantly. Rods need twenty minutes to recover, so you must avoid bright beams entirely.
Why Red Light Works Best
Red wavelengths above 620 nm stimulate rods less than blue or green hues. This specific physics allows red light benefits to shine during observation sessions. You preserve sensitivity because rhodopsin bleaches much slower under deep red glow. Obviously, any bright light still hurts, so keep intensity incredibly low.
Choosing Your Gear Wisely
Select a flashlight starting directly in red mode without cycling white first. Aim strictly at your planisphere, never letting spill hit your face or friends. Night vision preservation depends on using the dimmest usable light for every task. If the room feels dark after switching off, your setting was too high. Use short bursts instead of continuous beams to maintain maximum sensitivity outside.